This is a basic tutorial on how to incorporate one of our gradient yarn sets into a pattern. The basic idea is to have a brief overlap section between skeins so as to create the illusion of one slowly changing color. (Credit for this technique goes to The Unique Sheep.)
Scroll down to see a gradience version of the Weaver’s Wool Mini Shawl. (The original pattern is by Peggy Pignato. The pattern below was reconstructed without a pattern, as it was unavailable at the time of writing.)

When incorporating a gradient yarn into an existing pattern, you can use your own judgment as to how many sets you will need, depending on the colorway. Depending on the pattern, you may wish to calculate the number of rows or stitches and divide them into five or six (depending on the colorway you choose) in order to evenly space the colors, or you may decide to wing it. It’s your choice!
The transition section is 12 rows. The color you have been knitting with, I will call the “old color.” The new color you are transitioning to, I will call the “new color.” Work the transition section as follows:
- Work 2 rows of new color.
- Work 4 rows of old color.
- Work 4 rows of new color.
- Work 2 rows of old color.
You may now cut the old color and continue in the new color only.
* * * * *
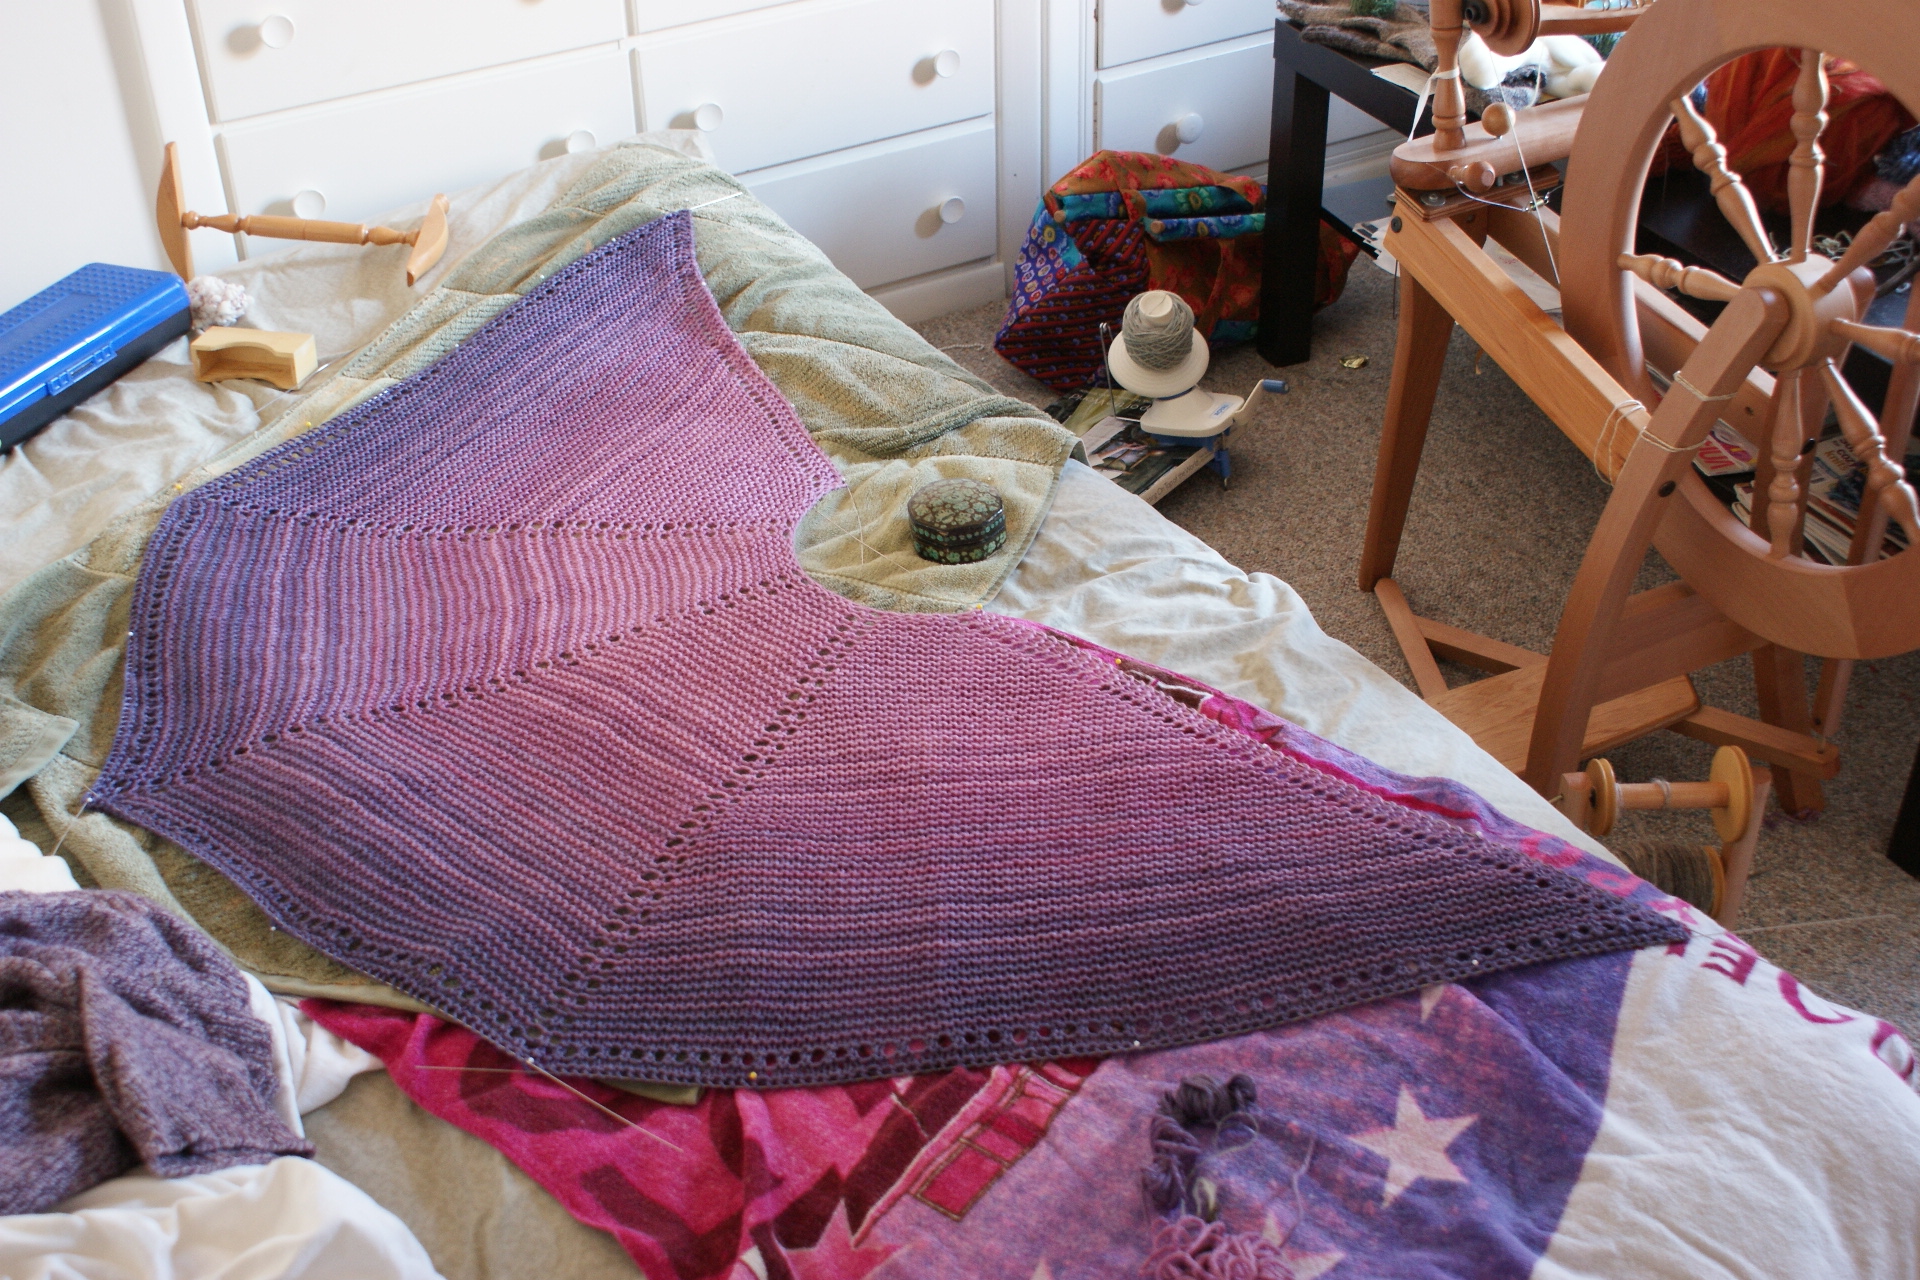
Weaver’s Wool Mini-Shawl in a Gradient Yarn
original by Peggy Pignato; reconstructed and adapted by Rebecca Osborn

Materials:
- One 5-skein Gradient Set from Osborn Fiber Studio (545 yards total), either base (worsted or aran weight).
- US 10 needles, 32″ or 40″ circular recommended.
- 4 stitch markers
Gauge is not too important in terms of the pattern, but if you are using one of our gradient sets, you will want to make sure your blocked gauge is not larger than 3.75 stitches per inch. (i.e. 4 st./in. is okay; 3 st./in. is not okay). If your stitches are larger, you will run out of yarn before the color transition is complete, which will annoy you greatly.
Size after blocking is approximately 60″ wide and 22″ deep. (Of course, if you do not use one of our gradient sets, you may use whatever yarn you like and it can be any size you like.)
Techniques and abbreviations:
- K – Knit.
- YO – Yarn over.
- K2tog – Knit 2 together.
- Sl 1 – Slip 1 as if to purl, with yarn in front.
- PM – place stitch marker.
- SM – slip stitch marker.
- RS – Right side.
- WS – Wrong side.
Notes:
- During a transition section, do not cut the two yarns as they switch back and forth, but carry them up. When four rows are done in the same color during the transition rows, you will want to wrap your working around the unused yarn once to continue carrying it up on the wrong side.
- To avoid having a line of floats very close to the edge of the shawl, do not start a new color with the first stitch. Instead, do the first two stitches of a new color row with the old color (this is always Sl 1, K1), then start using the new color.
- Keep these carries loose.
- You can always tell the right side because the right edge has a stitch marker. You may also wish to place a locking stitch marker on the right side to help you keep it straight.
- New colors always start at the beginning of a right side row.
- For the purposes of this pattern, two rows of garter stitch are called a “ridge.” Counting ridges is easier than trying to count rows, especially at the beginning.
Work each color transition section as follows:
- Work 2 rows of new color.
- Work 4 rows of old color.
- Work 4 rows of new color.
- Work 2 rows of old color.
Directions:
Cast on 29 stitches (any cast on will do).
Row 1 (WS): Sl 1, K to end.
Row 2 (RS): Sl 1, K2, PM, *YO, K5, YO, PM, K1* 4 times; K2.
Row 3: Sl 1, K to end.
Row 4: Sl 1, K2, SM, YO; K until 3 stitches remain (slipping all other markers); YO, K3.
Row 5: Sl 1, K to end.
Continue as follows for the first four colors:
Row 1 (RS): Sl 1, K2, SM, *YO, K to next marker, YO, SM, K1* 4 times; YO, K2.
Row 2: Sl 1, K to end.
Row 3: Sl 1, K2, SM, YO; K until 3 stitches remain (slipping all other markers); YO; K3.
Row 4: Sl 1, K to end.
AT THE SAME TIME, follow these directions for changing colors.
After working 43 total rows of the first color (23 ridges), begin the transition section into the second color.
After working 8 rows (4 ridges) of the second color only (after the transition section is over), begin the transition section into the third color.
After working 6 rows (3 ridges) of the third color only, begin the transition section into the fourth color.
After working 4 rows (2 ridges) of the fourth color only, begin the transition section into the fifth color.
After the transition section into the fifth color is complete, continue as follows:
Work 2 rows as established. On the second row, remove all the stitch markers as you work across.
Row 1 (RS): Sl 1, K2, YO, K1, *YO, K2tog* until 4 stitches remain; K1, YO, K3.
Row 2 (WS): Sl 1, K to end.
Row 3 (RS): Sl 1, K to end.
You should now be on a wrong side row. Bind off all stitches loosely. (Binding off on the wrong side will create one last purl ridge.) Block and enjoy!


I love it!
LikeLike
This was explained so well! I basically did the exact same thing when knitting the “Wash Me Tank” with Raspberry Rouge gradients. Only I used a 6-color gradient.
LikeLike
Love it! Color palettes are done for you, takes the guess work out!
LikeLike
This was a great way to explain incorporating the wool. I was skeptical to try gradients but love them. It is time to start my first project. Thank you.
LikeLike
You’re welcome! Enjoy your gradients… they’re a special experience 🙂
LikeLike