This post is part of a spin-along through 51 Yarns by Jacey Boggs Faulkner, in the Wool n’ Spinning community. For other posts in this series, check here.
I actually spun this yarn in April, since in April we had a little more time, and I wouldn’t be able to make this yarn over the summer.
This yarn starts, unusually, with an investment. I’ve done a few art yarns, and always been frustrated by the fact that my Ashford Traditional wheel is just not made for the super bulky. I’m saving up long term for another spinning wheel, but even that wheel wouldn’t be able to do everything without a bunch of extra bells and whistles. And I know I’ll be doing some art yarns for this SAL, so why not? So I took a little of my wheel savings and bought a bulky flyer for my Ashford traditional. It has four speeds from 4.5:1 to 12:1, so I was also excited to use it for plying.
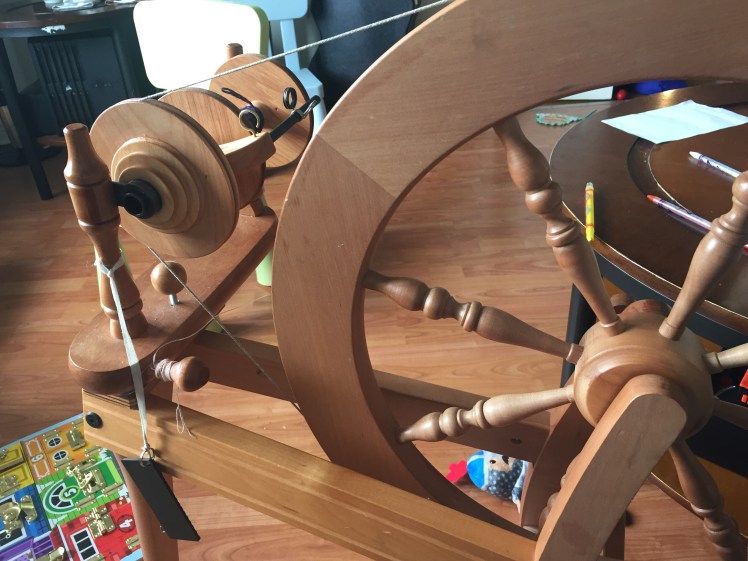
At first I was not thrilled with it; it has a bit of a wobble, and the listing did not inform me that it was unfinished. But having thoroughly tested it, it works fine, and a friend let me use her linseed oil to finish it up all pretty. (I did correspond with the website I bought it from; they offered to take it back for full refund and graciously received my feedback about noting the lack of finish in the listing.)
The first spin on it was this tailspin.
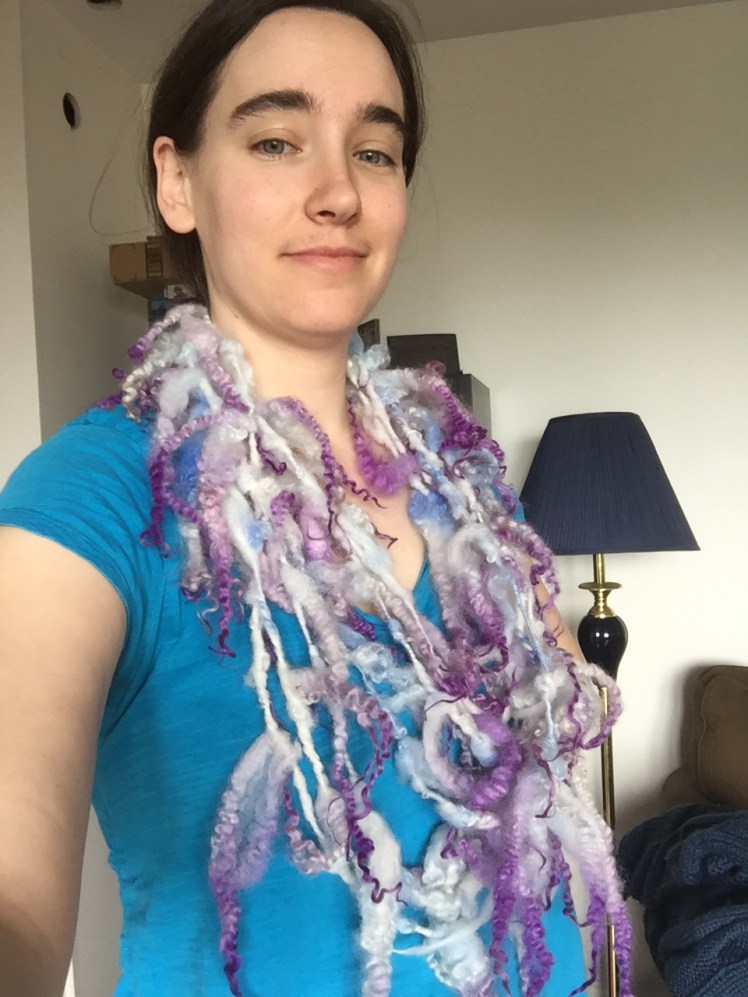
I had set aside two thirds of the Masham locks from my longwool spin to be used for this tailspin. Clearly that’s what these locks were made for. They are dyed so beautifully and those tips are just glued together.
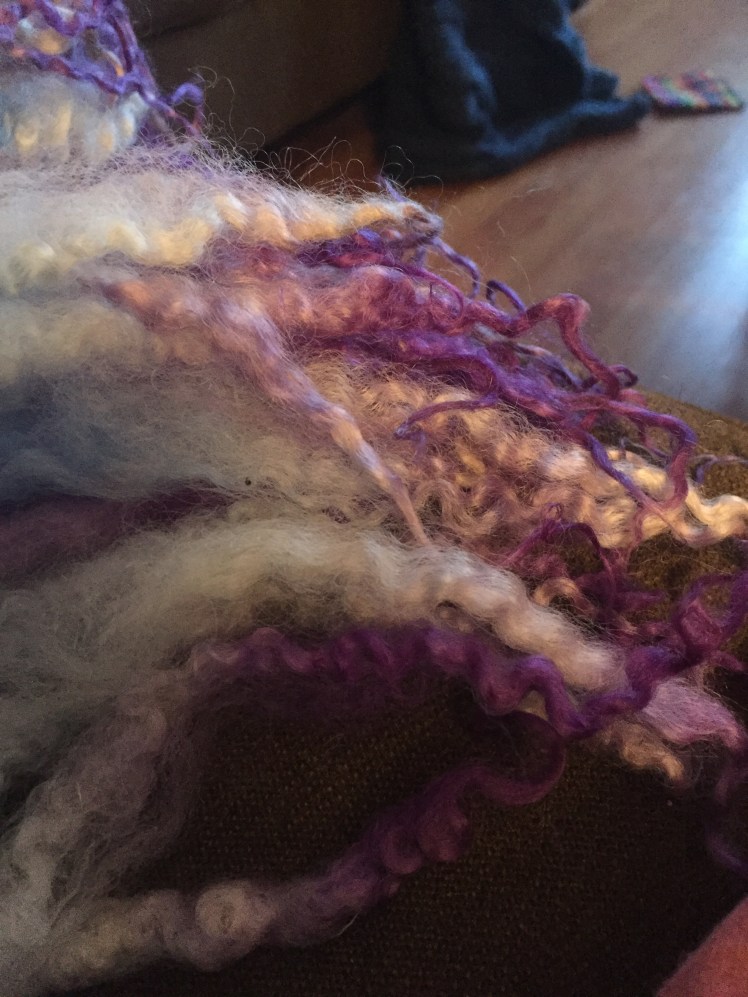
I have tried tailspinning before but without much success. The tailspinning chapter in 51 Yarns was very broad, and included what I would call lockspinning, when you just kinda pull locks apart and spin them in a jumble. To me, tailspinning is when a long part of each lock is hanging down from the yarn like a garland, or an impossibly upsized eyelash yarn. I’ve seen some truly epic tailspins from Esther Rogers, and while I don’t expect to get to that level, her work is what I find inspiring.
As I began to say, I knew what kind of tailspinning I wanted to do, but didn’t really know how to do it. So I turned to YouTube, which is such a great way to get a diversity of ideas. My favorite was this video about coreless corespun tailspinning. My takeaways were: 1) tailspinning can be like corespinning (which I know how to do) and 2) tailspinning is sloooow. It was good just to watch how slow she moved, and that even with her country spinner (a special art yarn wheel) she was going so slow.
Before beginning, I should say I discovered how important it was to prep materials beforehand. I was patient enough to card up some Suffolk to be my “roving,” but it would have been smart if I had carefully separated and laid out my Masham locks beforehand. Although if I had done that, I probably would have separated them too much, so never mind. It was better to adapt my technique on the go this time. But next time I’ll be more patient and lay out my materials. That’s so important with art yarns, the more so the more complicated it gets. Art yarn looks like an awesome jumbled mess at the end, but the making is more fun with some organized mise en place.
I tried three different methods over the course of my locks.
First I took the general method described in the video, but I added a core. I corespun the locks over kidsilk haze while sort of wrapping the lock butts in roving to help secure them. This worked ok but it was a lot to juggle the roving, core, and locks, and I didn’t feel I could get confident and tidy with it. The only plus about this method was that with the secure core and light wrapping, I could scootch the locks closer together if I wasn’t happy with their positioning.
Second, I ditched the roving and just corespun the locks. I’d split the butt of the lock and use half to corespun around the back half of the butt of the previous lock. That sounds really weird, but it was fun. The limiting factor was that the locks were as far apart as the split butts allowed them to be, but this was fairly close together compared to the other methods.
Third, I decided to ditch the core and try the method shown in the video. This was easier than I thought it would be, considering I’ve never done coreless corespinning before. What effectively happened is that I held the front half of one butt together with the back half of the next, corespun roving around it, then corespun the lock around it a little. This felt surprisingly natural, smooth, and secure. Again it was the butts themselves that defined how close the locks were; there was no core to slide them along to make them closer together.
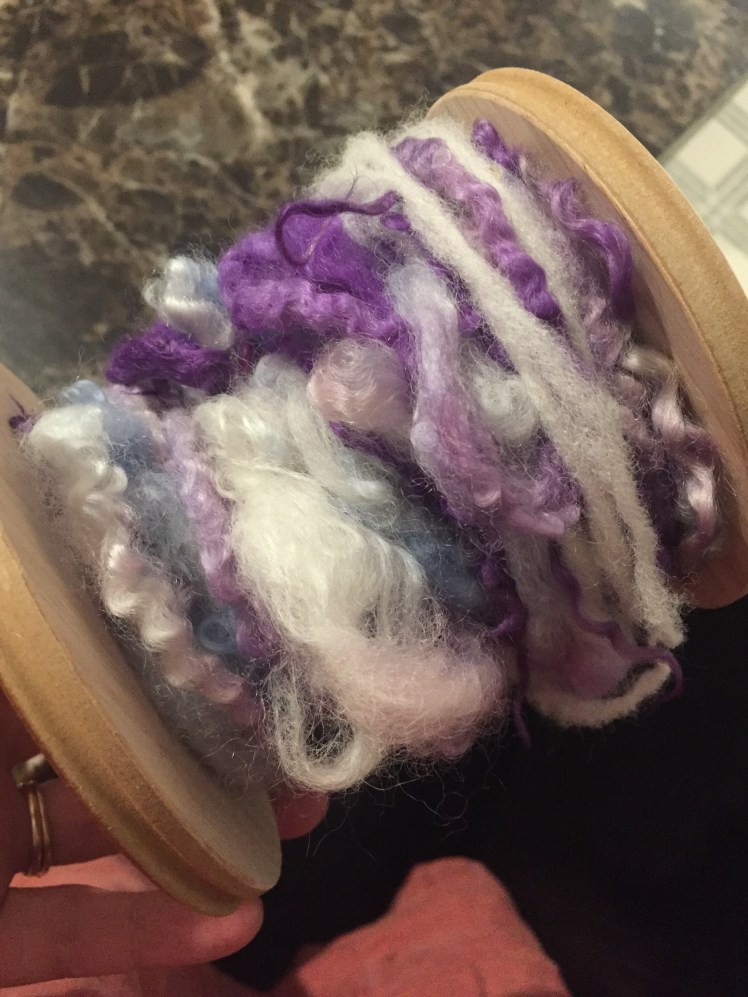
This is what a bulky bobbin full of tailspinning looks like.
Of course there are lots of ways to tailspin; this is really just my messing about with one method. I’m interested to see what others try when the group gets there.
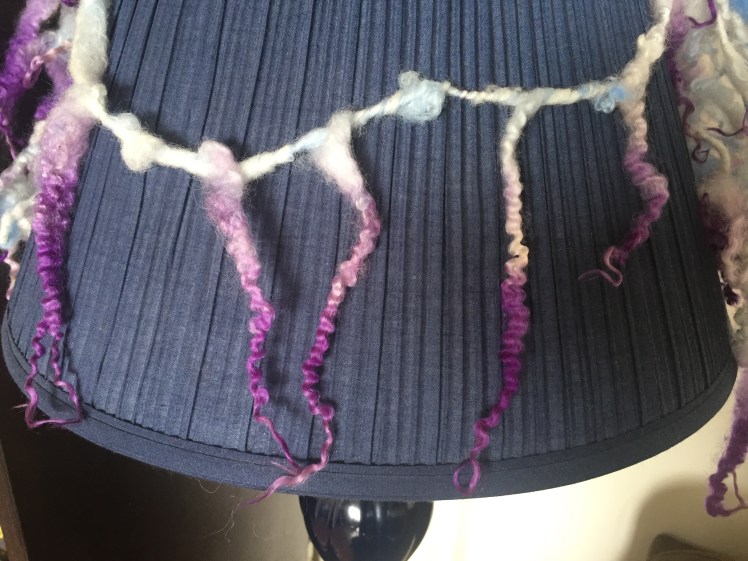
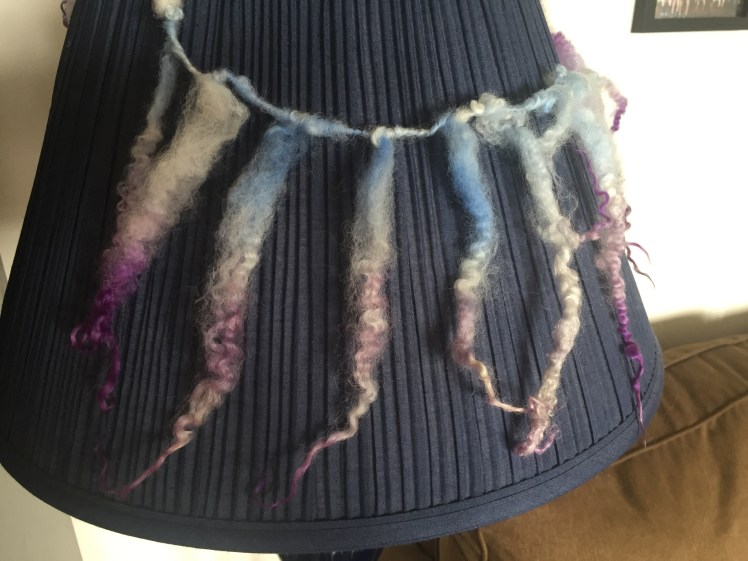
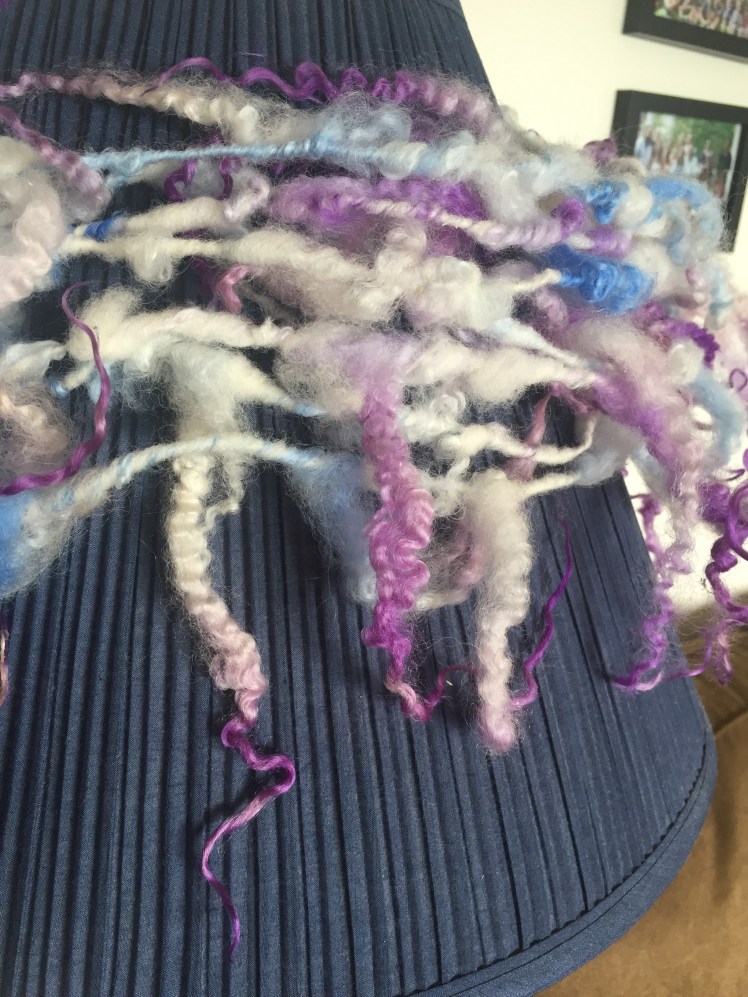
I wrapped the whole mess around my kitchen chair a few times, and steamed it thoroughly – always satisfying.
Verdict: I enjoyed the third method the best, but I like the results best from the second method.
I now have an unexpected problem: what do I do with it? This skein is too big to keep in my 51 Yarns binder, but I want to keep some for my records. I could knit it into a really wild hat, I guess.
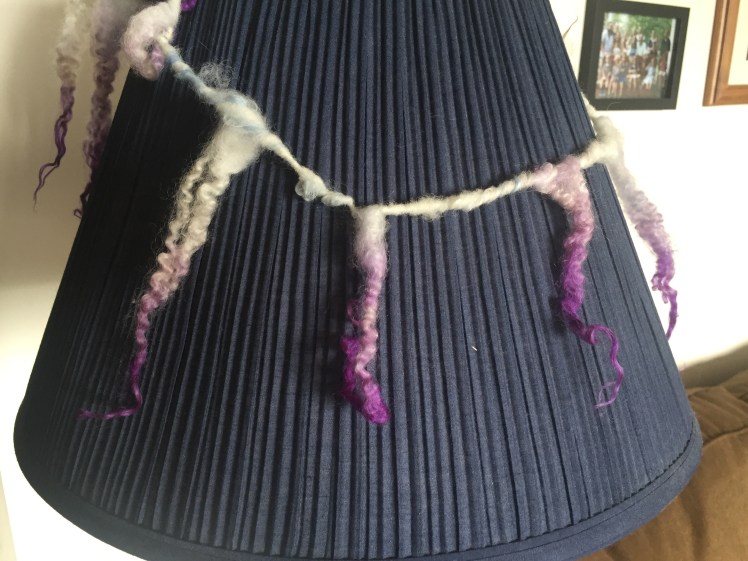
Ever since I made it, it has been an awesome (if untidy) lampshade ornament.
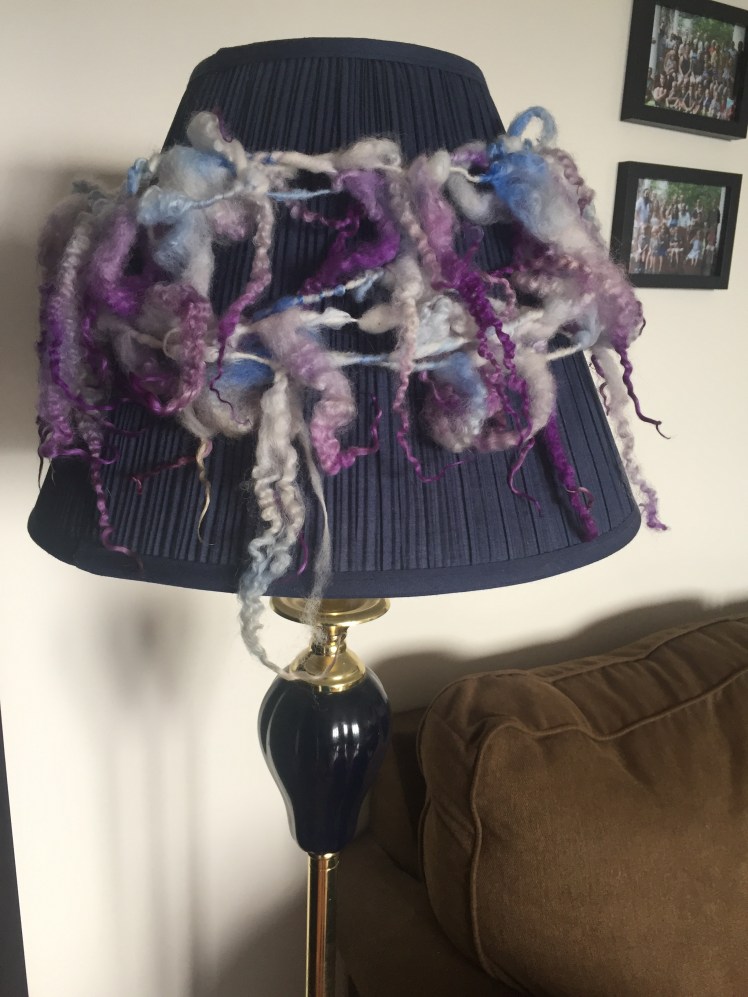
I tried wearing it as a necklace, but my wardrobe is not up to that level of statement piece.
Well anyway.
I don’t expect tailspinning to be a major part of my crafting career, but it was fun learning a little more about this technique!

One thought on “12 of 51 Yarns: Masham Tailspin”