My Draper Vest, which I am making out of Leicester Longwool yarn from Underhill Farm, had been humming along nicely. I was through back and fronts, and had a good start on one of the long collar pieces, when I noticed something. I ignored it for a while, but soldiering on couldn’t hide it: my knitting was butt-ugly.
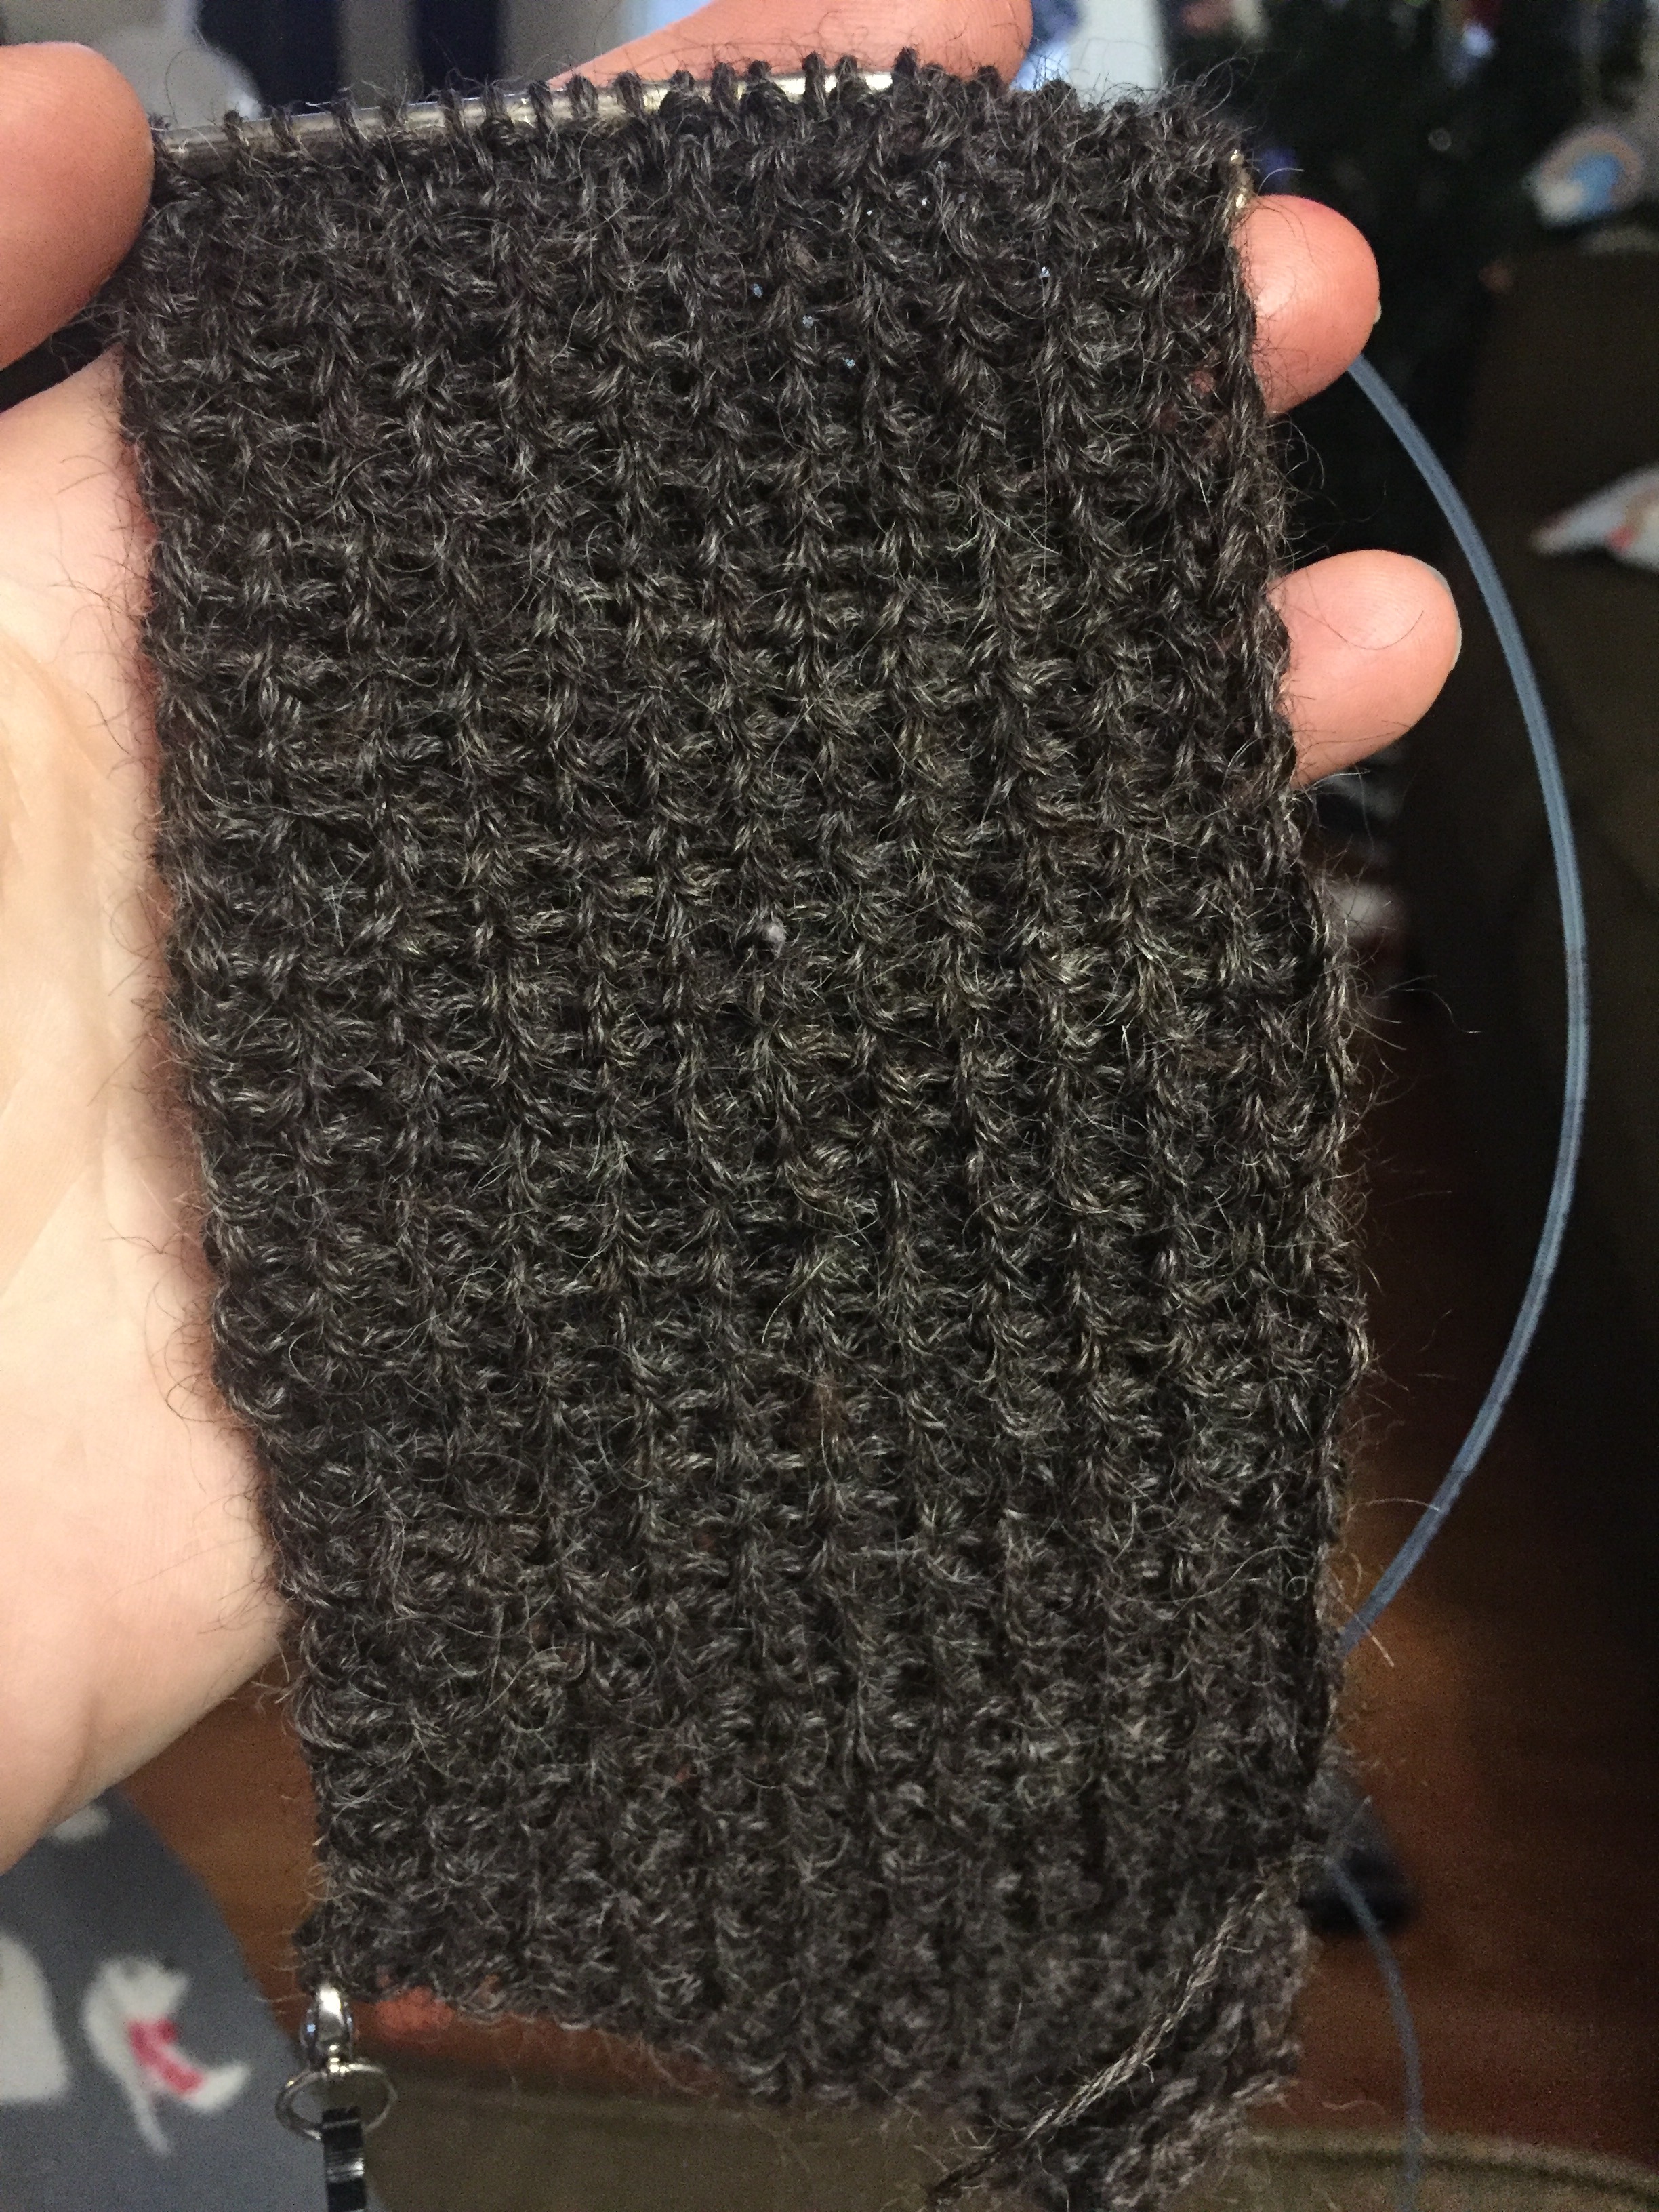
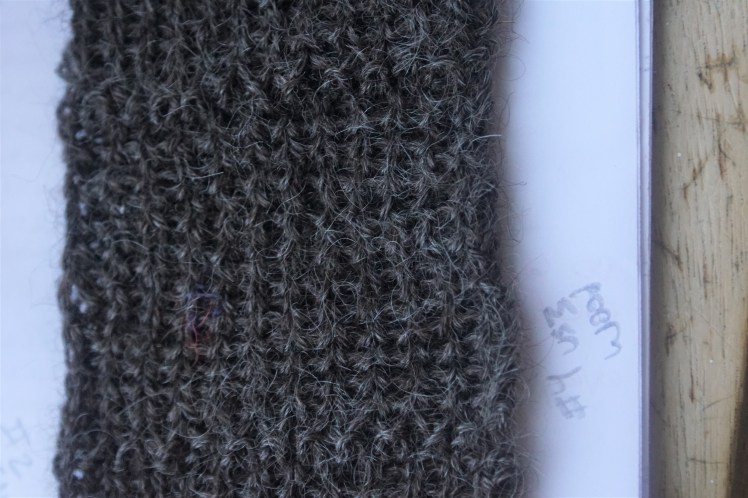
This is 1×1 rib. At least, it’s technically 1×1 rib, but it looks like a dog’s breakfast. The knit stitches are weirdly widened and pushed together. Additionally, the whole fabric has a sort of wobble, due to my knits being apparently a bit tighter than my purls. Because this is knit flat, that means that every other stitch in the same column is a little tighter or looser than the ones above or below it. It’s pretty awful.
This was twelve days ago. I posted to Instagram, asking for advice, and got lots of ideas, most of them coming down to: swatch something different. Just what I wanted to do: stop in the middle of an otherwise successful project – which I had swatched for, by the bye – and go through another swatching process, with many more variables? I grumbled a bit.
Then Marysa (amaryntha) said, “Just a tiny swatch?”
Something about that got my back up. I realized I was being a baby. I’m not going to let reluctance to knit a little rectangle get in between me and a successful garment. It’s time to put on my big girl pants, grow up, and SWATCH! Ain’t no tiny swatch neither.
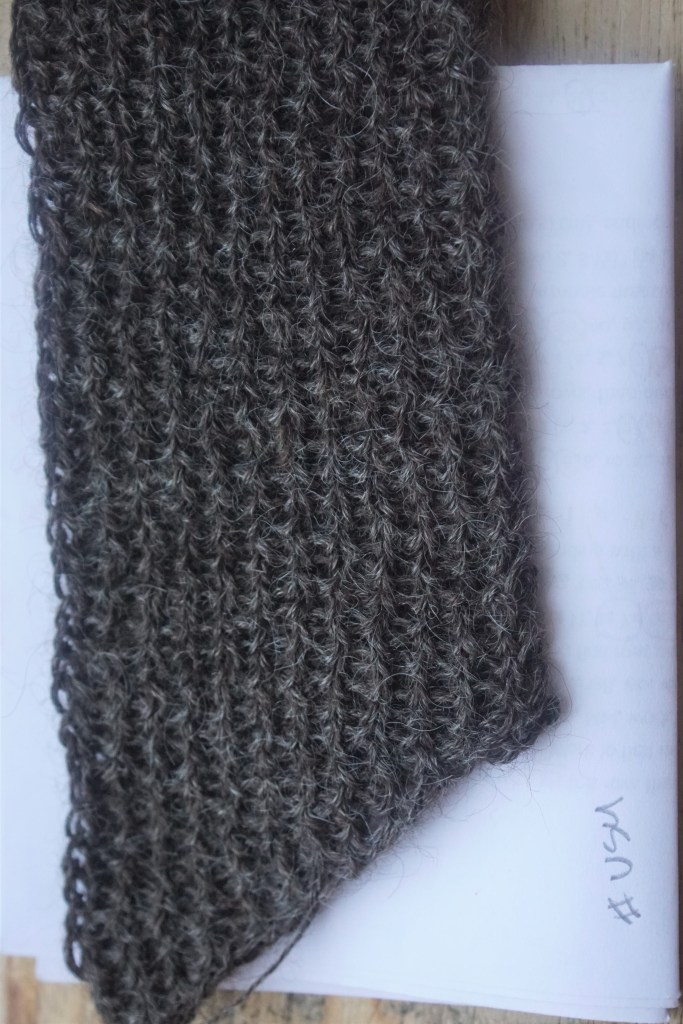
This is what I started with. You can see that blocking didn’t help much. This is a sport weight yarn on US4 Addi Turbo Clicks.
I implemented suggestions from my Instafriends one at a time.
My first change was to just pull the purls tighter. I developed a little tug just after the purl to tighten it up. This was the suggestion of Matt (division79). It did produce a slightly tighter and neater fabric, a bit less wobbly, but it didn’t get rid of the problematic characteristics of the fabric in general.
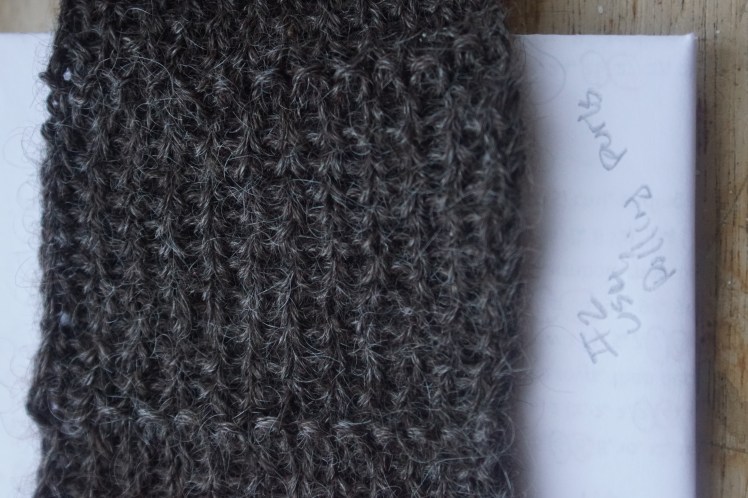
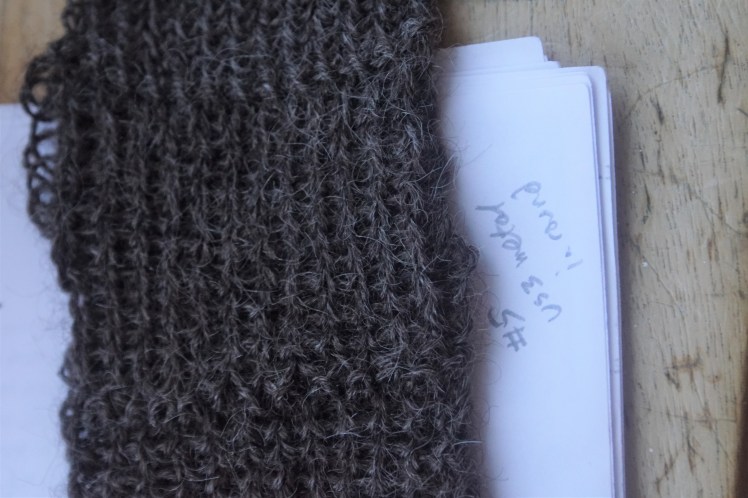
Next, I went down a needle size, which was Kelly (dominionfleece)’s idea. This is on metal US 3s, not sure of the brand. I still pulled the purls tight.
This is a lot better; it still looks messy, but I can see that the stitches in each column look more consistent.
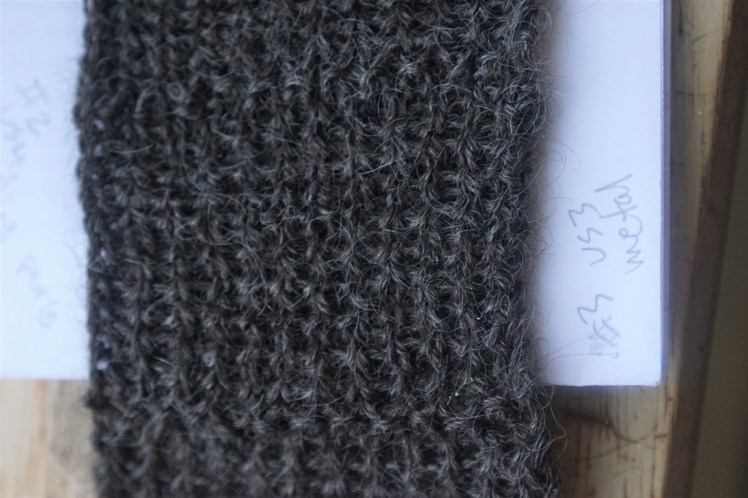
Finally, I followed Dielle (diellicious) and Diana (dianatwiss)’s suggestion to use a needle of a different material. The idea being that if you use a needle with more friction, like bamboo or wood or plastic, the stitches will stay tighter when you pull them tighter. I used my knitpicks rosewoods in size US3.
This was not better, and if anything was less neat than the metal US 3s. Rosewood is still quite slippery, which is why I can stand it. Bamboo or plastic might be better, but I got rid of all my bamboos a long time ago because I snap them at this size. I’ve never had plastic needles really.
As a sort of control, I knit a bit while pretending to go in the round. (There are long floats behind the swatch.) If I could get rid of the wobble that came from knitting flat- I would always be knitting the same stitches and purling the same stitches- that would at least eliminate that variable.
This did successfully ditch the wobble, so that factor is elimanted. But still, the stitches were distended, widening so much that you can see through them.
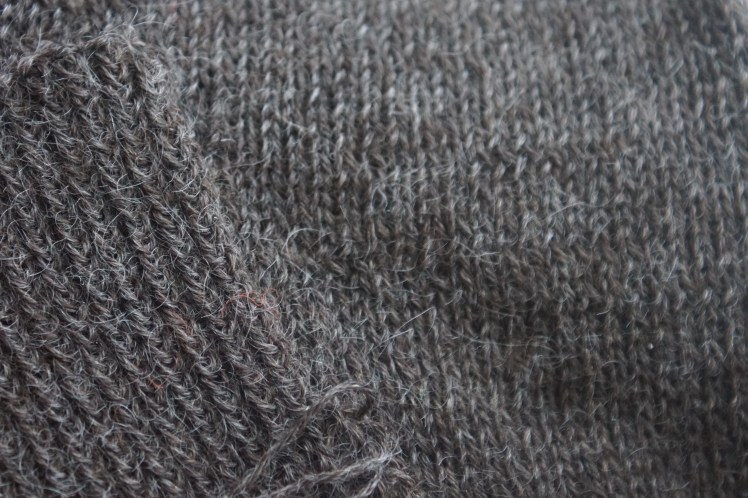
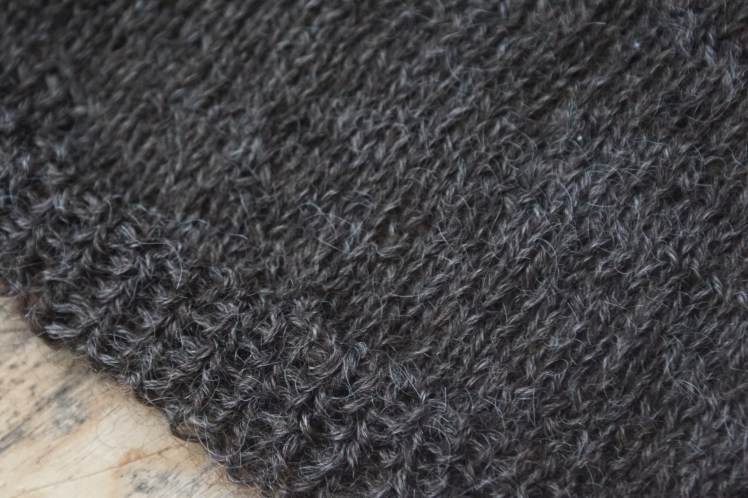
By comparison, here’s some other in-the-round 1×1 rib I did recently on some woolen-spun yarn made from Columbia-Targhee cross, a medium-fine wool with plenty of crimp. You can see it’s not great, but it’s not nearly so bad, and it’s not even blocked yet.
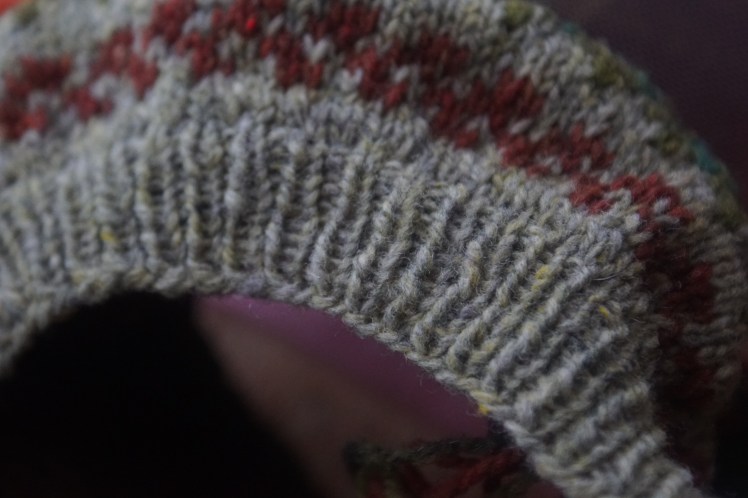
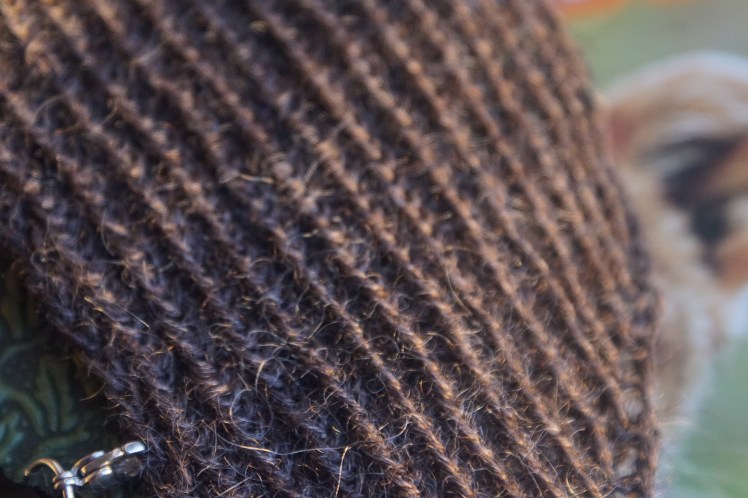
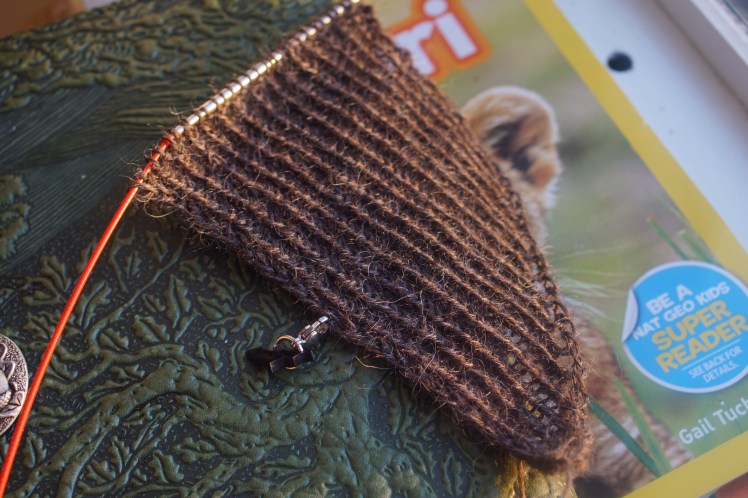
Lastly, I switched tactics completely, and followed songbirdfibres’ suggestion to use twisted rib. I used the US 3 metal needles because they are extra pointy, making twisted rib less miserable.

Wow. This is completely different. Even knit flat, it’s super even. I knew it would be tighter, but it was perfect.
This was more than tightness, and I’ve spent days now ruminating on why the twisted rib is so different in this yarn. Here is my endeavor to explain why.
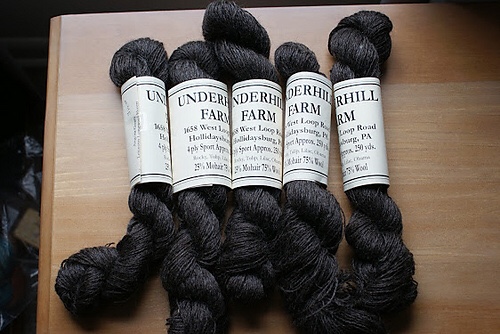
Unlike nearly every other yarn I’ve used, this yarn is 75% Leicester Longwool. It has been spun in a manner very appropriate to a longwool: just a little bit of twist in each of its four plies, plied with a very low twist angle.
One thing to know about longwools is that they do not like to bend. The long fibres, with their wide diameter and gentle wave, do not fold neatly. (Short crimpy fibres, like merino, are the opposite.) This is not bad: it makes Longwool excellent for boucle, but not so great for chain plying… and, it turns out, 1×1 rib.
Now I will employ the aid of some horrid little doodles.
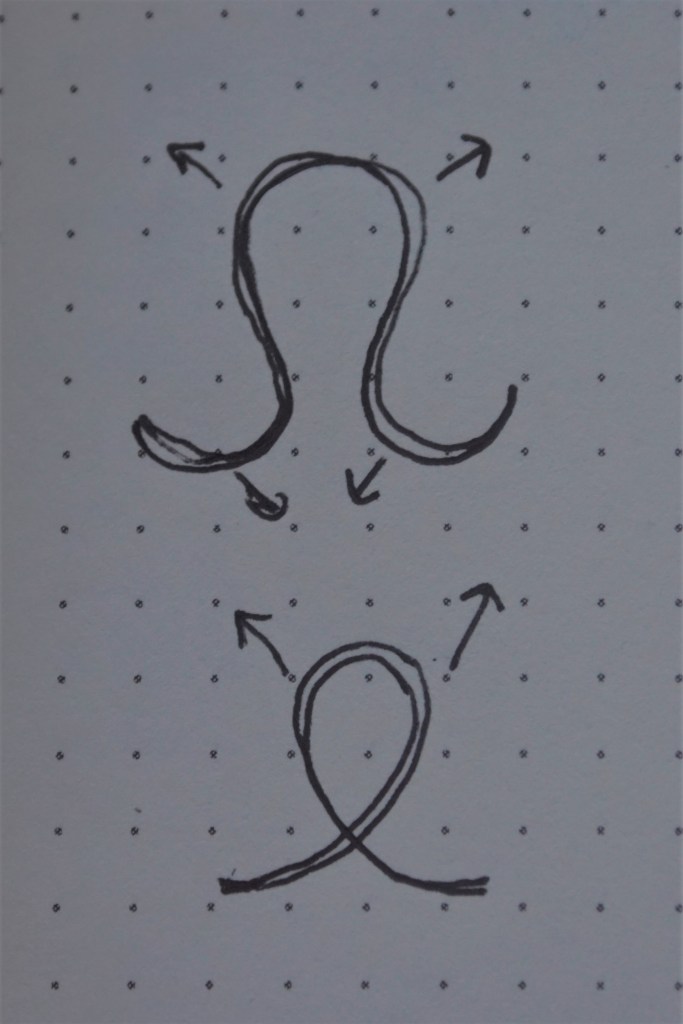
On top is a regular knit stitch, below is a twisted knit stitch. A longwool is always trying to unbend itself, trying to open up the loops it is forced into. In both cases, the arrows show the force the unbending fibres exert on the stitch.
But this is only half the story. Above is one stitch as it sits on the needles, but a row of stitches has a bottom bend as well. Below is a row of stockinette stitches with its neighbors.
As you can see, in this context the top bend (emphasized in brown) and the bottom bend (emphasized in blue) have about the same curve. So in stockinette, even though the longwool is trying to unbend, it’s exerting about equal force all over. That, plus the nice relaxed gauge I used, explains my lovely stockinette, thank you very much.
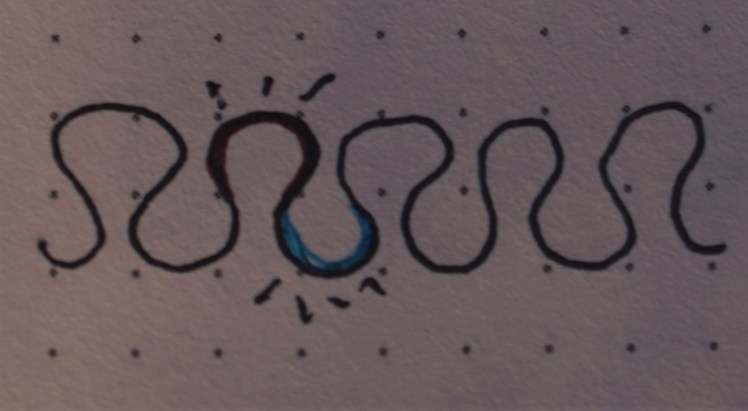
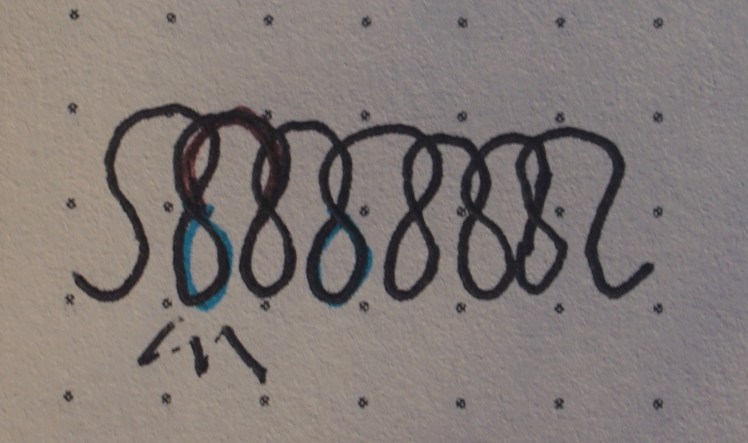
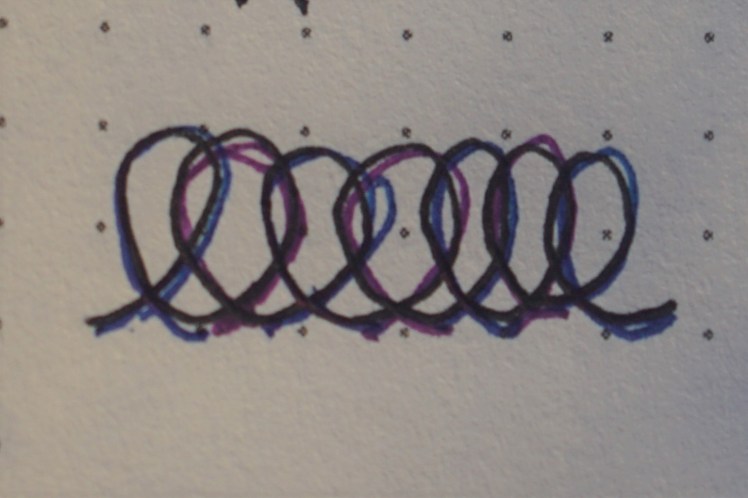
However, the story gets dramatically more complicated in 1×1 rib. Alternating columns of knits and purls push each other forward and backward, so that the stitches in fact overlap. Here are some regular (non-twisted) knit and purl stitches in a 1×1 context. The purls are outlined in purple, the knits in dark blue. Can you imagine the blue stitches in the front while the purples ones recede to the back?
The next doodles shows how the top and bottom bend of each stitch are no longer equal. The top bend is simple enough (brown) but the bottom bend (light blue) looks very sharp and contorted. But it only looks that way from the front: in reality it’s more unbent than it looks.
So far I’ve only shown you front-facing pictures of stitches. But a stitch is more than a simple loop. The top and bottom horizontal curves actually lean away from the straight up and down “legs” of the stitch. Here is my attempt at doodling a side on view of a stitch:
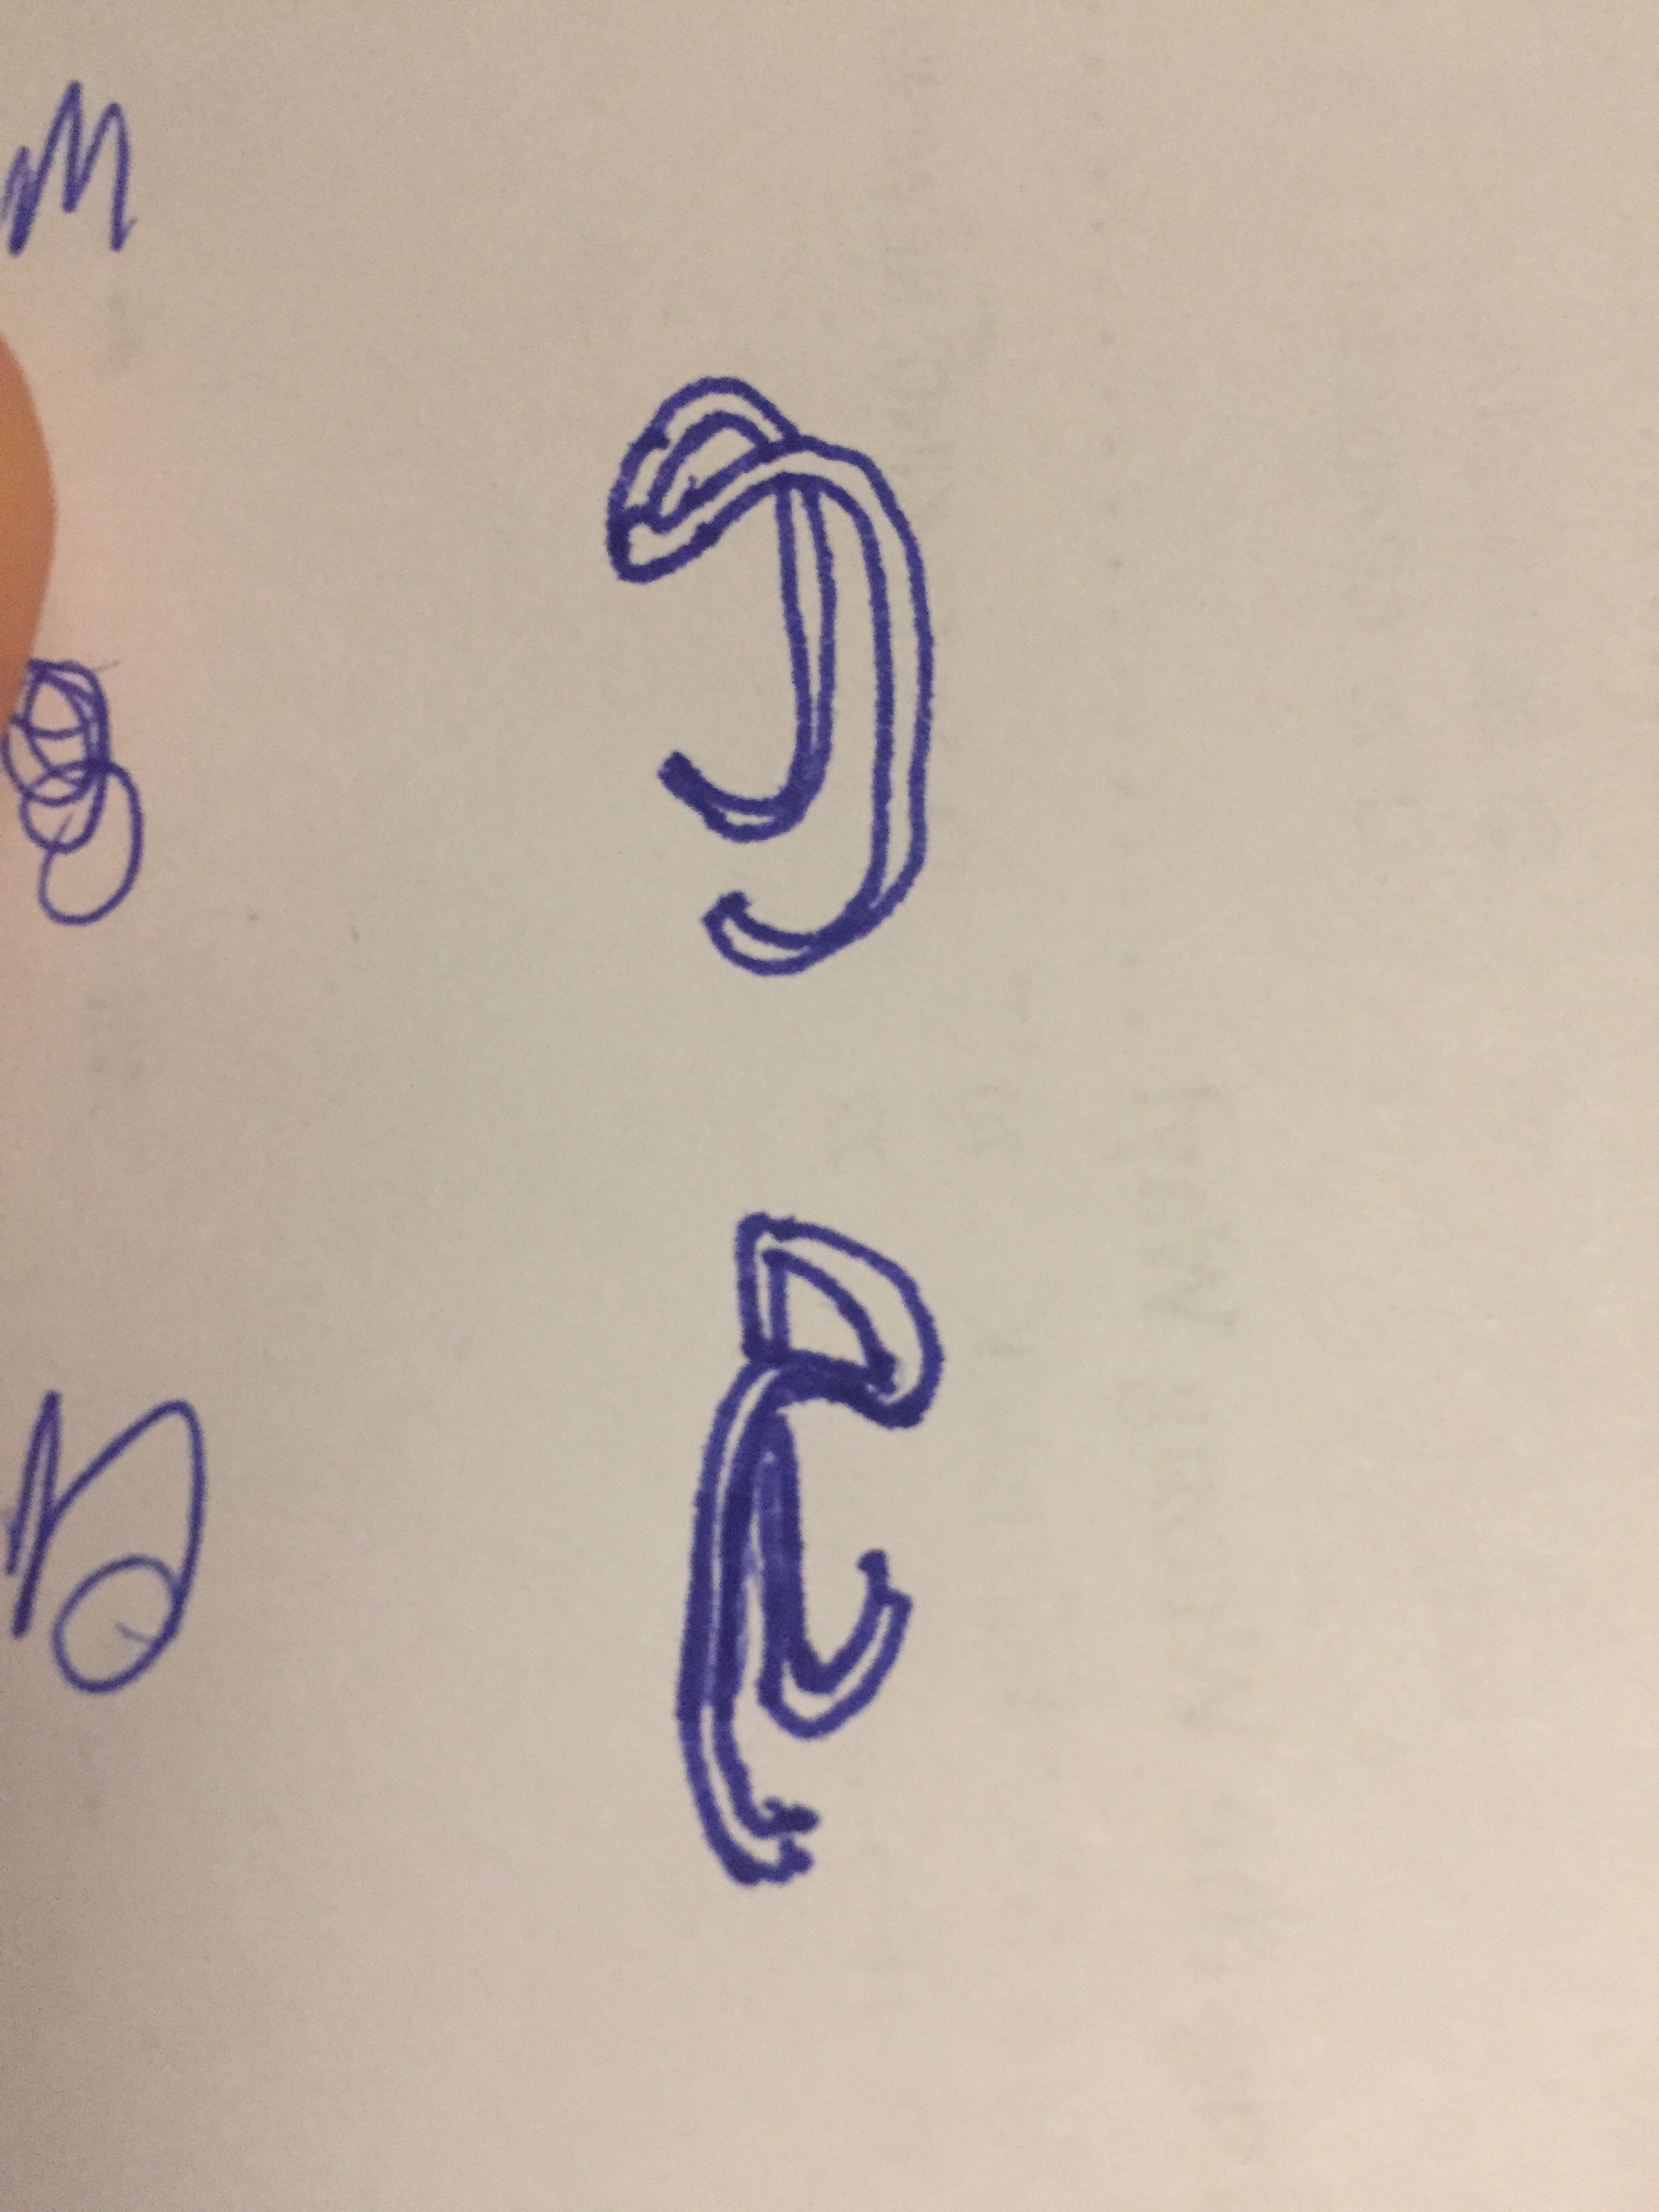
In stockinette or garter, all the stitches in a row have their loops pushing back in the same direction. They all look like the top picture, or they all look like the bottom picture. That’s where purl bumps come from; the horizontal parts of the loops are all leaning in the same direction, while the vertical “legs” are visible on the knit side. But in 1×1 rib, the lean is constantly switching back and forth.
Can you imagine attaching the two shapes above together at the bottom ends? Instead of just curving back around like the top loop does, the bottom loop crosses over to the other shape. The longwool, trying to unbend from that sharp light blue curve two pictures above, makes the most of this crossover space, pushing the columns away from each other, making it puffier, more open. This openness transfers in turn to the top loop, which opens up so much that you can see the “ladder” of the purl side right through the gaping knit stitch. (Here we reach the limits of my doodles; I rather wish I knew how to 3-D model this for you.)
So what makes twisted rib so different? Above I showed you a lonely twisted stitch, let’s see one with its neighbors:
This is an imaginary twisted stockinette stitch row, meaning all knits. As you can see, unlike in ordinary stockinette, the bottom and top loops have very different amounts of bend. The top loop is tightened up because it was made to twist, while the bottom loop opens, as it has to cross from the far side of one stitch to the far side of the next one.
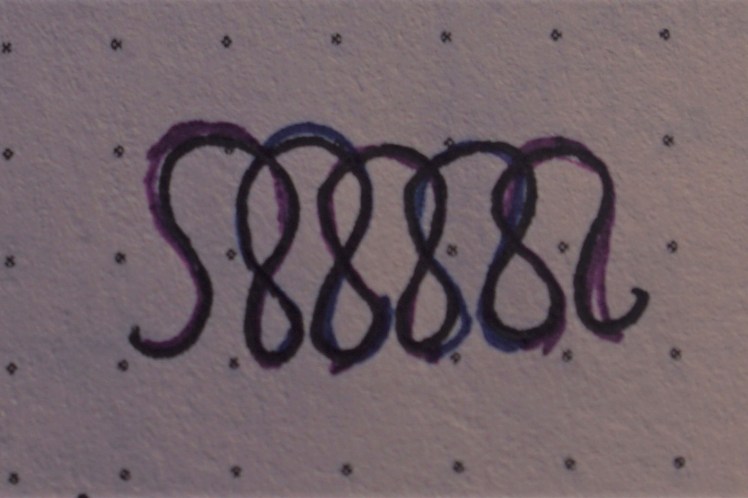
Now let’s see twisted 1×1 rib. Again, imagine the dark blue stitches in front while the purple stitches recede to the back.
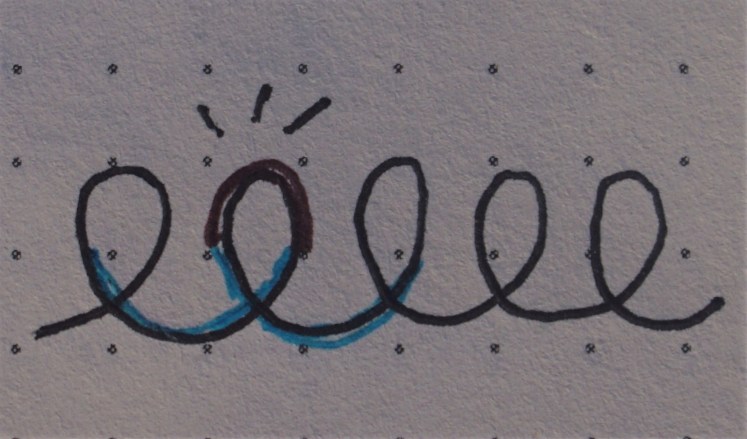
This time, I’ll highlight the top and bottom bends again.
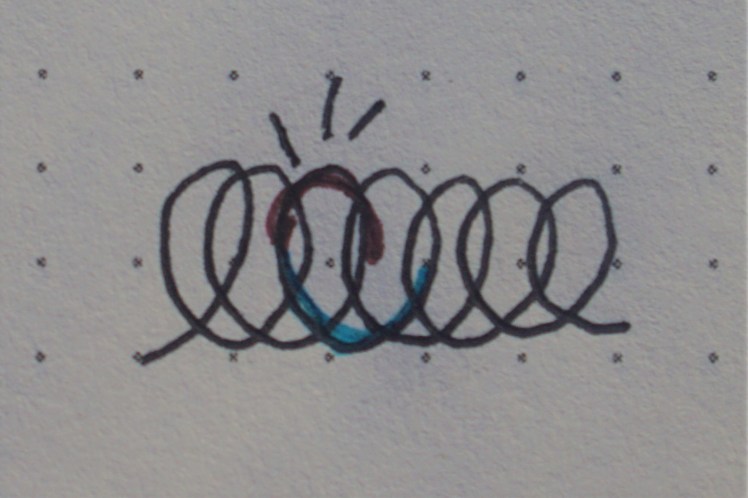
Here’s what’s so interesting: the bottom bend in regular 1×1 rib was very bent and needed somewhere to send that extra unbending force, so it sent it the easiest place it could: perpendicularly, through the fabric. In twisted 1×1 rib, it’s already the most un-bent part of the fabric. It has no need to unbend more, because it has so far to reach. The top bend is more interested in unbending, but it’s very limited in how much it can un-bend, because it’s twisted. All it can do it make the twisted stitches – which can look a little strangled – look more plump and pretty than they usually do.
It might sound like I’m just saying that twisted rib is tighter than regular rib. Fair enough, it is. But I am also saying that the way stitches are connected to each other in 1×1 rib provides a space perpendicular to the fabric for un-bendy yarns like longwools to broaden out, to let their energy escape by expanding the stitches to be bigger than the size that the needle made them. You’d have to go down many needle sizes for there to be a short enough distance between stitches to combat that. But the way that twisted rib stitches connect to each other mean that the straightening energy has already dissipated horizontally through the fabric.
Anyway. This is how I have convinced myself to knit approximately one million miles of twisted rib in a wide shawl collar.

Very interesting analysis of ribbing and long wools. I shall remember to knit a twisted rib if working with a long wool. This is a good reason to know your sheep!!
LikeLike
Your mileage may vary of course! I’m curious if others have the same experience with different constructions of yarn. Especially singles. Your vest knit with the yarn you spun from the silver fleece you got from me was probably longwool; did you do ribbing for that?
LikeLike
So fascinating! Thanks for sharing this with us. Man, before I went down the spinning and knitting rabbit hole, I never realized there was so much “math” involved in a well-made knit. But it can really make a difference in the finished product!
LikeLike