So… remember when I was going to knit a sweater? Like, forever ago? I asked you for advice and stuff and decided on Victoria, which I kinda knew would happen. It was going to be epic; I was going to do a bunch of posts about it, etc…
Well, I kinda just… knit it. It’s been done for like a month. Blog fail.
At least I took some pictures when it was finished!
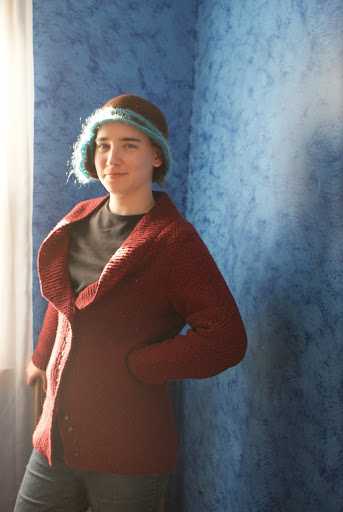
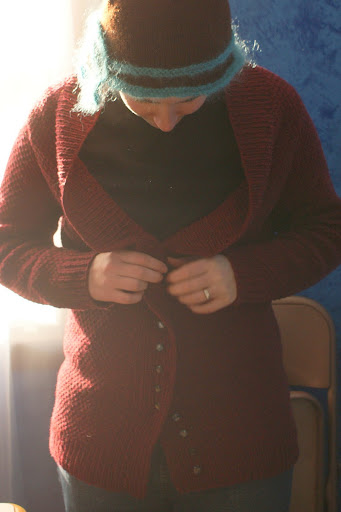
I really, really still haven’t figured out what to do with the collar. It won’t lie flat like the one in the pictures, and it seems to sit a lot lower. But I didn’t feel like changing it. So now it sorta sits there like “hey, look at my chest!” but I love it too much to let it bother me. Also, my row gauge seems to be much shorter than the patterns’ (probably because they were using a linen blend. Should have thought of that, DUH) so the buttonholes, spaced every 10 rows, are ridiculously many.
I’ve decided to make up for my bloglessness on the topic with a tutorial. A tutorial that you are going to love because it will fix all your problems. Or at least this one problem. Well, it might fix it. It could. Maybe. Anyway…
HOW TO RESIZE A FLAT-KNIT SWEATER
Picking the right size in which to knit a sweater is unreasonably difficult. Top-down sweaters have been all the rage for a while now, largely because you can try them on as you go. Usually knit from the neck down, you can put the yoke on waste yarn or a long circular to see exactly when it’s going to be the right size, instead of having to trust the pattern writer, know your exact dimensions, and understand the appropriate ease. Not to mention the fact it’s as likely as not that your gauge swatch, even though you made it and washed and blocked it, is going to lie to you. Like a little lying liar.
But I like flat knit sweaters. I like the fact that I can do them bits at a time, and don’t have to tote a pound of wool with me near the end of it. I don’t mind seams, and I think they add structure. Plus, most top down sweaters have a raglan effect that just doesn’t complement my torso shape and shoulders, not to mention my style.
Yet, I’ve never had to rip a piece of a flat knit sweater all the way back. Want to know how?
Step 1: Pick a size, to the best of your ability. Knit a swatch, block it, measure, do your due diligence. This technique is not going to get you out of doing your homework.
Step 2: Knit the back up the armholes.
Step 3: “Try it on.” By that I mean, hold the piece up to yourself. Block it, if your swatch told you the dimensions would change. Ask the hard questions. I usually drape the back under my side, holding one edge to the center of my back, and draping it around to the front. I know if it’s supposed to be kinda loose fitting, it should go past my belly button. You can also hold the sweater up to a sweater that fits you, but also that is similar in fit to the sweater you’re making. If you’re making a slouchy boyfriend cardigan, don’t measure the back against a fitted pullover. It would be better to compare it to a zippered hoodie, for example.
Step 4: Figure out how wrong the back is. If it’s perfect, stop reading. Mine are almost always too large or small by a couple of inches.
Step 5: Figure out, following the pattern, which size you should have been knitting. I’m calling this the NEW size. This is the size you are going to follow after the armholes on the back and front(s), and for the sleeves.
Basically, what you are going to do is make up the difference on the front. If the back was too narrow, you’ll make the front wider. If the back was too wide, you’ll make the fronts narrower. This will make a larger or smaller sweater, with the only change being that the underarm seam will not be exactly centered under the armpit. More on that later. (If the closest size is still the one you were following, you can still make smaller adjustments by adding a few more stitches to the front(s), without adjusting the back. The armholes will be slightly bigger, but you can just ease in the sleeve a little more.)
Step 6: Look back at the directions for casting on the back. What was the difference between the # of stitches you cast on, and the # of stitches you would have cast on if you’d made the right size? In my case, I should have made the next size up, and there was only an 8 stitch difference.
Step 7: The adjustment happens in the initial decreases for the armhole. For this example, I’m assuming set-in sleeves; more on other types later. On the back of most sweaters with set-in sleeves, the armhole decreases start with a few bound-off stitches, then integrate decreases for a while to make a nice curved shape.
Check the number of stitches that the pattern says to bind off in the NEW size (not the size you cast on). My pattern said to start the armhole by binding off 6 in the new size I wanted. Remember that 8 (or whatever) stitch difference between cast ons? You compensate for it here: if you want a LARGER sweater, cast off FEWER to start the armhole; if you want a SMALLER sweater, cast off MORE. How many? Take that difference between cast ons, and half it. So in my case, I wanted a bigger sweater, so I subtracted 4 from the 6 bind off stitches, and bound off 2 on each side to start the armhole.
Finish the back, following the directions for the NEW size that you want.
Step 8: Basically, I made the back too small, so now I have to make the front too large. (Or vice versa.) So when I cast on the FRONT of the sweater, I have to take that same cast on difference (in my case, 8 stitches), and ADD it to the cast on number for the NEW size. (or subtract, if you are going smaller.) If you’re knitting a cardigan, you have to split that # in half; for example, I added 4 stitches to each front.
Step 9: Knit to the armholes on the front(s). Here, you’ll do the opposite of what you did at the armholes on the front. If you cast off 2 more, cast off 2 less. If you cast off 2 less, cast off 2 more. So in my case, on the front I subtracted 4 from my BO of 6, so now instead of binding off 6, I bound off 10. This puts you back on track to work the remainder of the front(s) according to the NEW directions.
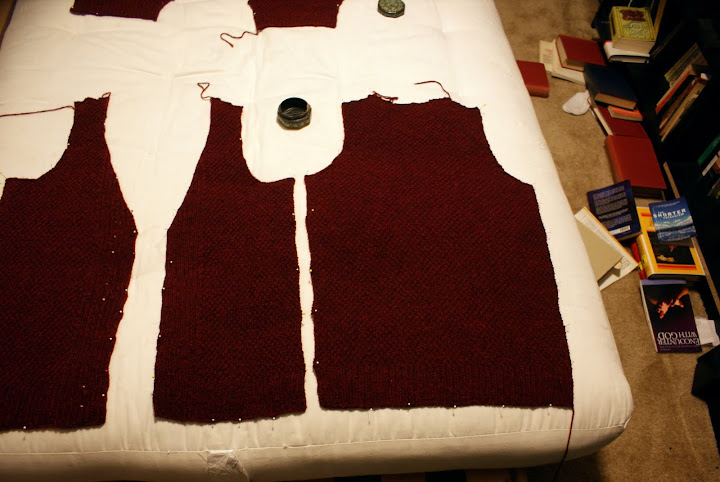
Above are my pieces being blocked. See how the front armhole decreases look way wider than the back? Together, they still make a whole armhole.
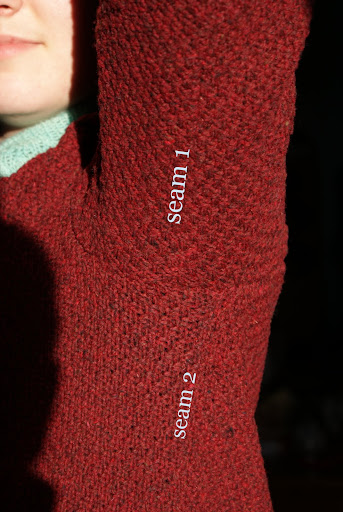
Step 10: After you’ve knit the sleeves, blocked all the pieces (because you’re a good little duck), and sewed the shoulder seams, the next step will be to set in the sleeves. When you do so, make the shoulder seam your referent to the center of the the sleeve cap. The edges of the sleeve caps will be off-set from the front and back pieces by the number of stitches that you added and subtracted. Thus, when you sew up the side seam and sleeve seam, it will jog across an extra bit of seam at the armpit. If you do a decent mattress stitch (and everyone should learn this; it’ll reduce the hatefulness of seams by 200% guaranteed), this jog will be so unnoticeable as to be meaningless. See the below, were “seam 1” is the sleeve seam and “seam 2” is the side seam – they don’t line up, but if you can’t see ’em (or if you have to shove your armpit in someone’s face to see ’em) who cares?
Objection A: That’s all well and good if you’re doing moss stitch, but what if your fronts and backs are patterned?
Objection B: What if I’m doing some other kind of flat-knit sweater, like a drop shoulder, or saddle shoulder, or pieced raglan?
Reply to Objection A: Depending on the pattern, of course, you’ll have to adjust the number of stitches that you add or remove if it would slice a pattern repeat in half. It’s a judgment call. With knit/purl patterns, even if it’s a wide repeat, it usually doesn’t matter. With cables, a cable can easily be cut in half and turned into a rib. It gets most complicated with lace. Remember that if you do mattress stitch, the edge stitch is going to disappear into the seam anyway, so it doesn’t matter if it’s a little ugly.
Reply to Objection B: If you’re doing a drop shoulder, you have two options. First option: If you find that your back is too large/small, you can just knit the back and the front as different sizes, but this shifts the location of the sleeves, so it only really works if the back is larger than the front. Most of us hunch anyway, so an extra couple inches in the back is fine – if you are particularly busty and have good posture, I guess you could make the front the larger piece. With most drop shoulder pullovers, the front and back are indistinguishable up to the neck – so if your first piece is too small, you can call it the front.
Second option: If you are lucky enough to have a pattern that tells you to mark where the sleeves will go on the front and back, even though you won’t be making any armholes, you can make adjustments. When you get to that point, you can follow the steps above, calculate the difference in cast ons to get your desired size, and cast on or bind off that “difference” to the back, and finish the piece. Then when you do the front, do the opposite (cast on if you bound off; bind off if you cast on) when you get to the same place. It will have the same affect of shifting the underarm seam. If your pattern does NOT give you the place of the armholes, you could just stop what you’re doing, knit a sleeve, and do some calculating to figure out where they would go, but that sounds like too much trouble to me.
If you’re doing a saddle shoulder or anything else that includes bind offs at the armhole point, you can follow the directions above. If you’re still knitting pieced raglans, with all the fabulous one-piece patterns we have… I have nothing to say to you.
Cheers! This is the first time I’ve seen this sort of technique suggested, so if you’ve read it elsewhere, please leave a reference in the comments, or if you disagree with me, object away. This post is long enough, so tomorrow you get some glam sweater shots from Florida, and a yarn & pattern review.
