Hello, everyone! This will seem terrifically random and out of context if you are reading it before April 8th, 2012. But it may still be useful to you, because it is a Tutorial on how to perform mattress stitch between two garter stitch selvedges.
Here’s the story: Mattress stitch is a lovely technique which, if you hate seams, might get you right over that unfortunate prejudice. It is a way to make seams beautiful every time, and nearly invisible. For some videos on how to do normal mattress stitch, check out these videos:
Bind-off to bind-off: http://youtu.be/1mqDnU4laSU
Bind-off to selvedge: http://youtu.be/7EO9UeEFhrA
Selvedge to selvedge: http://youtu.be/ajEITYFPKQM
(If you’re wondering, a selvedge is the side edge of a piece of fabric.)
The only possible downside to mattress stitch in most situations is that, although it’s invisible on the outside, it leaves a bit of a seam on the inside, which gets bulkier with bulkier yarn. This is almost never an issue, but you would get around it if you could, right? Well, you can, if you have knits and purls right on the edge of your garment, like with garter stitch or seed stitch.
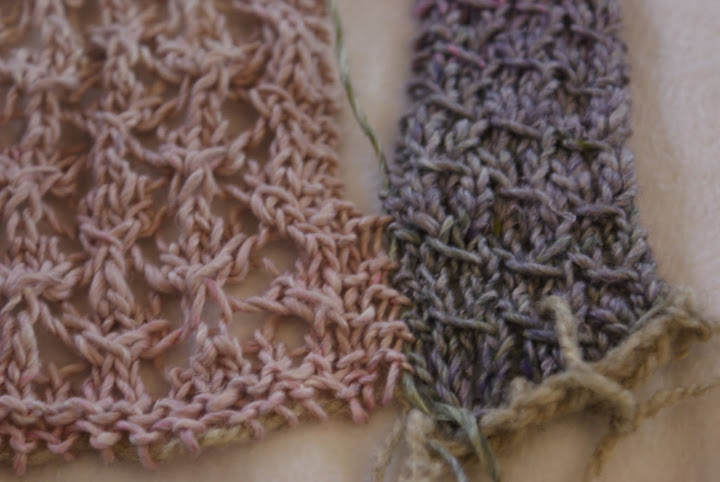
The first thing you will look for, when you lay your two garter stitch selvedges side-by-side, is what the garter “bumps” look like on the very edge of the fabric. Garter stitch ridges look like two rows of bricks stacked on top of each other, off-set by half. But on the very edge of a garter stitch row, there’s another “step” down or up at the very edge. You see it in the unsewn edges below?
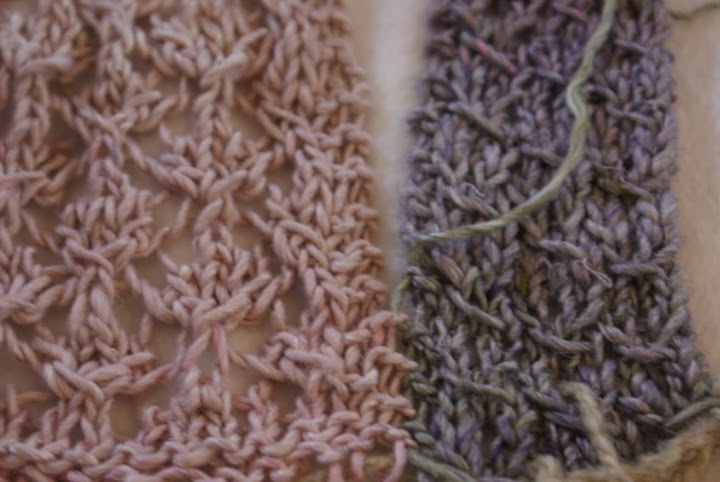
For mattress stitch on garter stitch, you have a choice on where you are going to sew. You can sew in that extra “step,” or in the last regular garter bump closest to the edge. For any given seam, I usually pick whichever of those two I can find most consistently. What matters most is that you are [more or less] consistent.
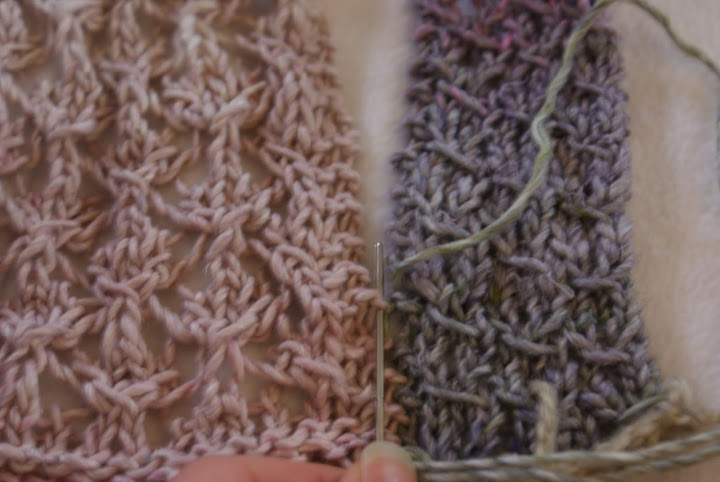
With mattress stitch, the needle is always going the same way: parallel to the seam, away from the beginning of the join. Below I’ve started on the left side, sewing into the “step” down, with the needle pointing away from myself.
Now I’ll go into the “step” up on the other side, going the same direction.
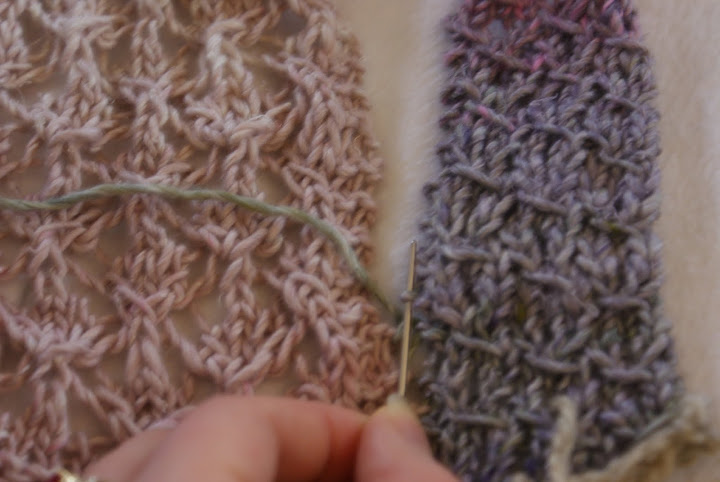
After doing a few stitches, you can see the seam yarn making a zig-zag between the edges. This is trademark mattress stitch, no matter the type, and the fun comes when you zip it up.
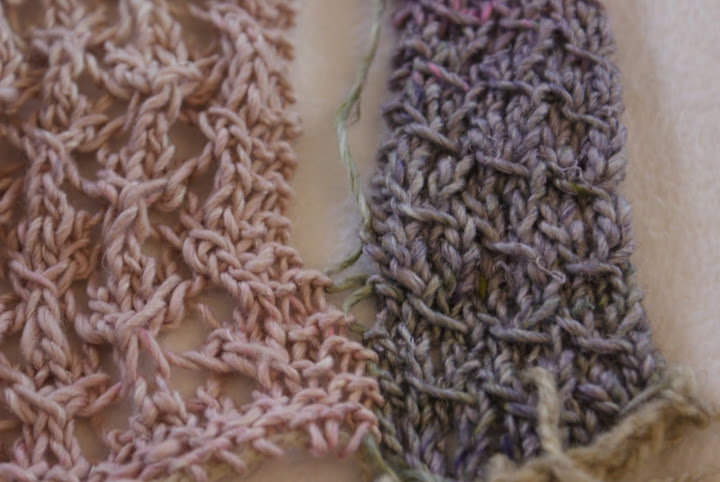
Pull it tight to see what the seam looks like. With mattress stitch generally, but particularly with this variation on it (since it’s looser), when the seam yarn is pulled tight, it actually makes a straight line within the seam. This makes it easy for the seam to get bunched up, or to be tighter than the fabric. So when the seam is done, but before I tie a knot or sew in the end, I go along the seam, stretching the two joined pieces of fabric along the seam yarn as much as possible. This is because I want the seam to be able to stretch as much as the finished fabric, so I have to make sure the amount of seam yarn is equal to the length of the fabric when it is most fully stretched.
Because you are sewing at the very edge of the piece, you have no bulkiness inside – in fact, it looks the same on both inside and outside.
The only possible drawback to this technique is that, since you are essentially only sewing in every other row, it is a looser seam. This means it might not be appropriate for tightly-knit or very bulky sweaters, where it might leave gaps. But for an open knit, or a cotton yarn, this is perfect, and I have used it many times.
This will be a little redundant to those who are linking to this tutorial from the Lily pattern, which comes out on Easter (hi people from the future! Wave at us back in January), but this is a good a time as any to announce that I did finally make a decision about what yarn to use for this fun pattern. It is called Aya, by Noro, a worsted-weight blend of cotton, silk, and wool. I used color #12, and I loved it dearly; it made me forgive cotton of nearly all my spite towards it (though I don’t know if I’ll ever forgive it for that whole linen stitch in Lion cotton thing). The Liturgical Year page has been udpated accordingly, but here is a picture for you:

It’s just come off the blocking wires, and the pattern will be winging its way to test knitters before the night is out, barring any snags. Metaphorical snags, of course. Although literal snags are also very upsetting.
