So, fair isle. Let’s be honest; if you’ve never done it before, it can be kind of intimidating. You can make some incredibly complicated-looking pieces with the technique, so the assumption is often “that looks so hard!” I confess I felt this way until I tried it, and even the I still thought it was awkward until I learned the traditional technique for it. But really, it’s just one thing. And once you learn how to do the one thing, all you have to do is use different combinations of colors, and you can do some incredible stuff.
The first thing you should know, to make you feel a bit better, is that traditional fair isle only uses two colors on any given row. If you see a design with more than two colors in a row, either the designer was being lazy, over-ambitious, or sadistic. (I’m not opinionated at all.) I would add duplicate stitch any day rather than design a piece with more than two colors in a row. If I end up changing my mind on this subject, I’ll be including tutorials on some brilliant way I’ve figured out to make it not a headache.
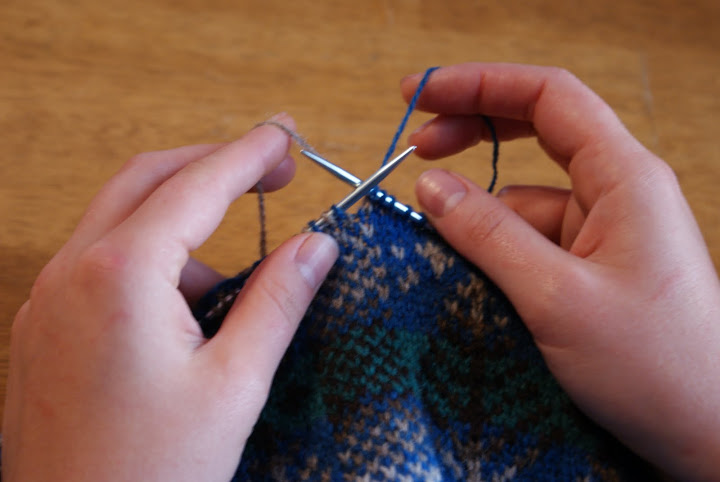
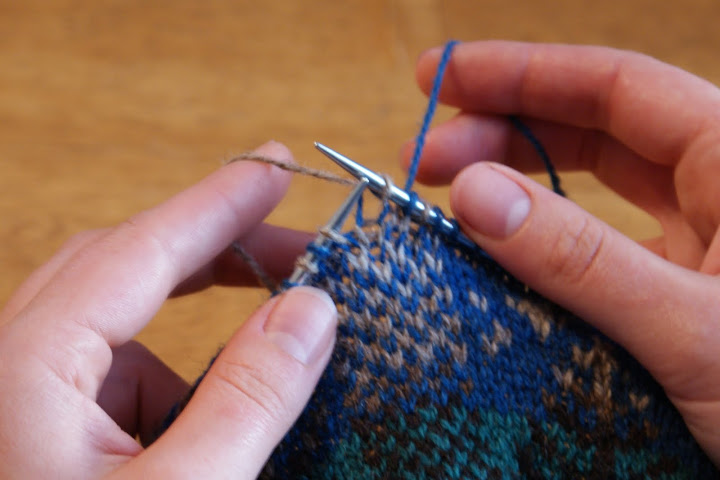
Traditional fair isle is performed with two hands – one of the two (and only two) colors in the row in each hand. Here’s the rule: You want the background color to be in your dominant hand, and the foreground color to be in your weaker hand. In other words, if you’re usually a continental (left-handed) knitter, hold the background color in your left and the foreground color in your right hand. Below, you can see me doing the opposite: as an English-style knitter, I have the background (blue) in my right hand, and the foreground (grey) in my left.
Why do this? Your dominant hand tends to work stitches a little tighter than your weaker one, and those looser stitches will pop and be more pronounced. So, most of the time, it makes sense for the foreground design to be slightly more pronounced, rather than having it retract into the background. If you’re doing a geometric pattern, like the salt-and-pepper section I’m working on in the picture, you’ll just have to decide which color you want to be slightly emphasized.
The other thing to know is that you will always be crossing the yarn in your right hand over, while you will always be crossing the yarn in your right hand under. This consistency means you don’t have any fussy twisting and untwisting of yarns at the end of a row.
You can also see in the above picture that I’m holding the yarn almost identically in both hands. That’s just something that I’ve figured out works for me.
First, the right hand. Right-handed knitters: just do this stitch the way you normally would. Left-handed knitters: if you’ve never knit with your right hand before, there are some great videos on Knittinghelp.com, or you can check out the video I posted yesterday on my right-handed knitting technique.
Next, the left hand. Left-handed knitters: just do the stitch the way you normally would. Right-handed knitters: again, you can see some videos on Knittinghelp.com, or follow the brief directions below.
Left-handed/Continental knitting is also called “picking,” and English is also called “throwing.” When you’re using your right hand, the working needle is pointing away from the hand holding the yarn, so you have to wrap it all the way around the needle. When you’re using your left hand, the working needle is pointed right at the working yarn, so the needle can just snag it or “pick” it up to pull it through the loop.
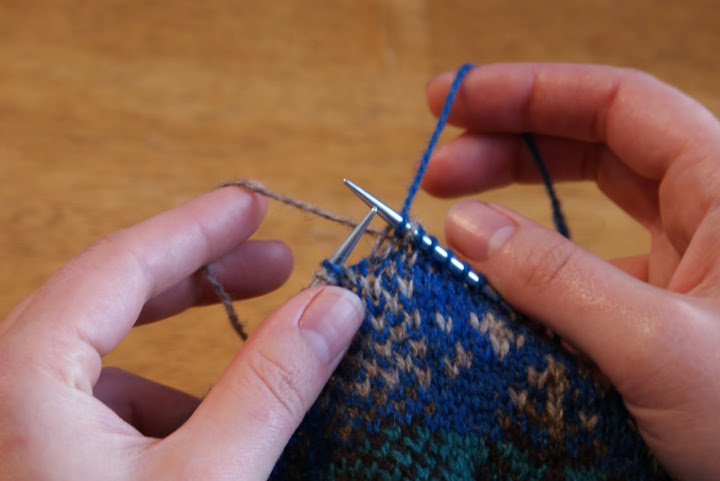
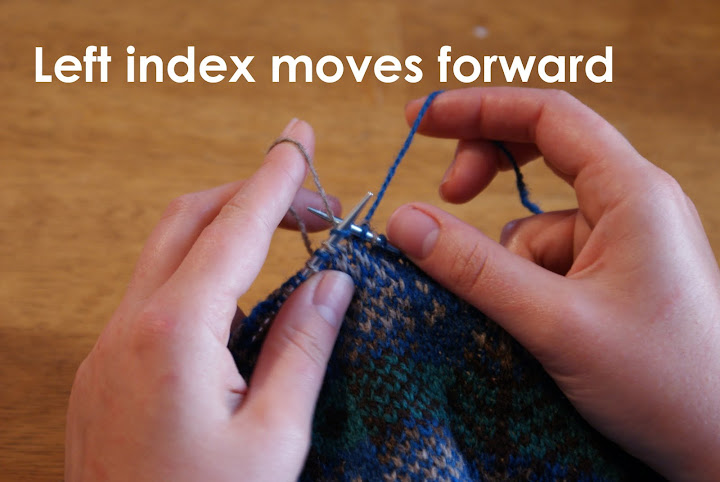
Observe. First, insert the working needle into the next stitch knitwise, as you normally would. Since I hold the yarn sort of up and away to the left, I move my yarn-holding fingers toward me slightly, so I can easily scoop the working needle over the working yarn and down behind it.
Once the needle is behind the yarn, I move my yarn-holding fingers back away from me, so the yarn is now wrapped around the needle.
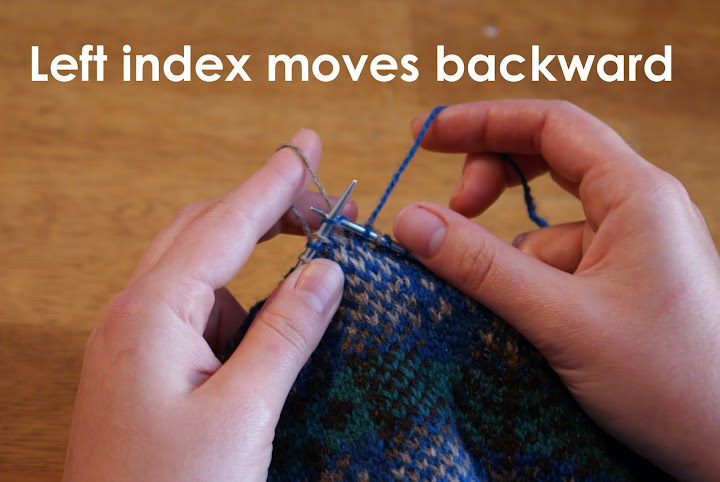
You then bring this wrapped yarn through the previous stitch (the blue stitch in these photos), as you would normally. Since the yarn is coming from a different angle than what you’re used to, this might take a few tries. I find that holding the yarn in a more upwards direction, as opposed to angled more away to the left, helps.

Ta-da!
A word about tension: The only other thing you need to know about basic fair isle knitting is how to tension the yarn. Fair isle’s basic tenet is that every row uses both yarns, but not for every stitch, so for every stitch there is a “float” of the unused yarn on the back of the work. Say you’ve done a couple of stitches with color A (blue), and you’re back to using color B (grey). It’s key not to pull color B too tightly, but to let the float just sit behind the two stitches of color A. If you pull it too tight, the fabric will pucker. To get the handle of this, I have heard it recommended that you keep the most recent stitches on the right needle fairly well stretched-out, so you have to make the float longer than you usually would. I don’t know that this helped me, but I know that you will get better with practice, until your fair isle is the perfect tension without even having to think about it. Good tension, plus consistently crossing the yarn in the right hand over top and the yarn in the left hand underneath, makes the inside of a fair isle piece as cool looking as the outside.
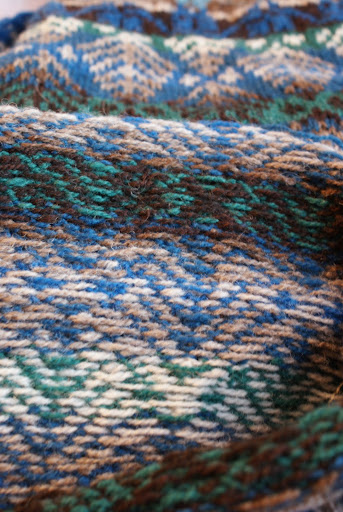
If your first fair isle looks wonky, don’t sweat it. But ALWAYS BLOCK. And wet block it – even if you don’t pin it, just get it really wet and let it dry flat. Whether it looks funky or perfect, blocking does absolute wonders for fair isle in particular.
The technique discussed above is basic fair isle, which works with smaller motifs that don’t have long stretches of one color for more than 4 or 5 stitches. Tomorrow I’ll show you what to do when you have bigger motifs that require long stretches of one color, which would leave impractically long floats on the back of your work unless you do something about it. But do something you can.

Does your blog have a contact page? I’m having problems locating it but,
I’d like to send you an e-mail. I’ve got some recommendations for your blog you
might be interested in hearing. Either way, great
blog and I look forward to seeing it develop over time.
LikeLike