Let’s talk about buttercream.
There are umpteen recipes for frosting. To run a cake decorating business, I needed one buttercream recipe that was excellent and reliable. I wanted it to be easy to make, to look amazing when piped, and to hold up well. This was literally the first one I tried, again from that Craftsy class I keep recommending, “Startup Library: Cake Decorating.” I’m going to share it with you, with my adaptations, and just like yesterday, tips below.
Swiss Meringue Buttercream
This is doubled from the original recipe. I find that I need this much frosting to fully cover an 8″ 4-layer cake and add lots of buttercream decorations. If you are just doing a basic crumb and final coat, without much extra piping, you can stretch this to cover an additional 6″ 4-layer cake, or maybe two x 8″ 4-layer cakes. Instructions for what to do with leftovers follows.
Ingredients:
- 1120g sugar
- 1 carton (2 cups) egg whites
- 1 teaspoon salt
- 3 lbs unsalted butter, softened
Instructions:
- You will need a double-boiler setup – either a double boiler, or a large glass or metal bowl that fits on top of a smallish saucepan. Put an inch or two of water into the bottom of the double boiler, ensuring that the water does not touch the bottom of the bowl when you set it on top. Set the water to boil, then turn it down to simmer.
- Add egg whites and sugar to the bowl and set it on top of the simmering water. Mix with a whisk for about 20 minutes, until the egg whites are hot to touch, and you can pinch the egg whites between your fingers without feeling the grains of sugar.
- Pour the hot egg white mixture into the bowl of your stand mixer, or into a separate bowl for mixing with a hand-mixer.
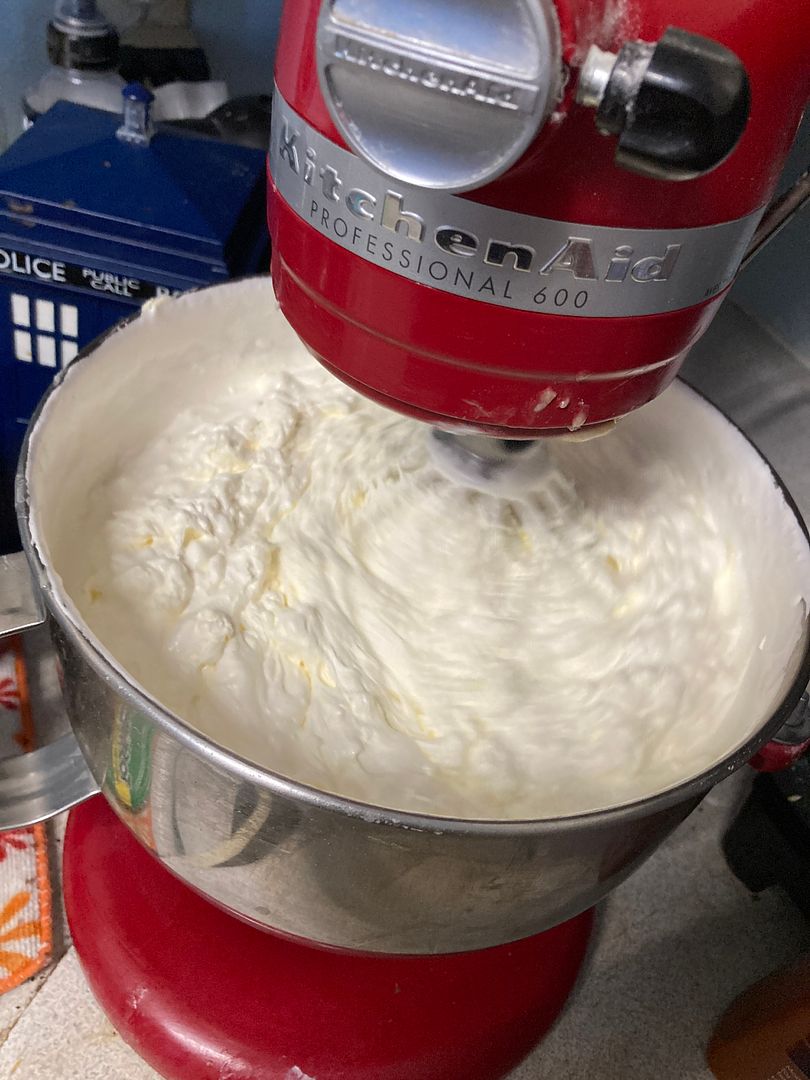
- Using the whisk attachment, whip the egg whites on medium, slowly increasing to high, and mix for 5-10 minutes, until soft peaks form, and bowl feels not-so-warm on the bottom.
- Turn the mixer to low speed, and add the softened butter, one stick at a time. Be careful as your mixing bowl will get very full.
- When the butter is incorporated, slowly turn the speed up to the highest setting.
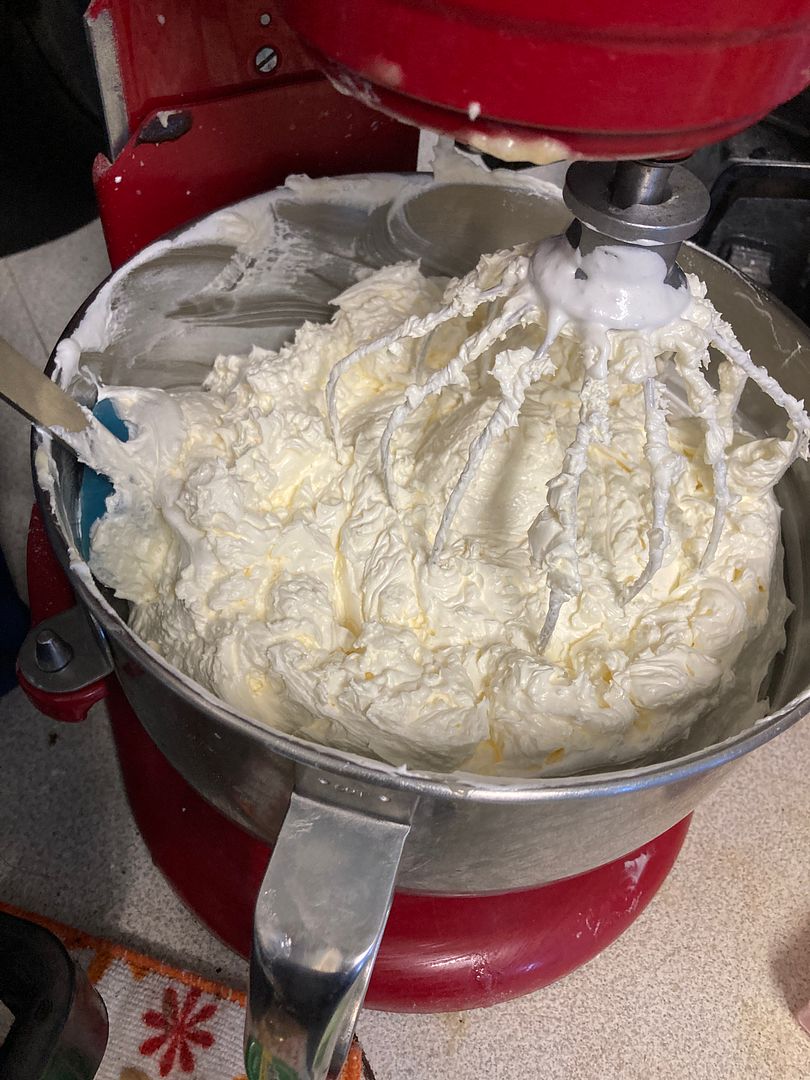
- Stop and scrape the bowl to make sure all butter and meringue are incorporated. Mix on high until it looks like buttercream.
CHOCOLATE VARIATION: melt 11 oz of chocolate chips using your favorite method (I just use the same double boiler). Wait till it’s cooled down a good bit, then whip it into your finished buttercream.
Okay, now here’s the long version, with pictures.
On pasteurizing eggs: Since we’re using egg whites from a carton, they’re already technically pasteurized, or so it says on the thing. That’s why I don’t give you an exact temperature. That, plus both my thermometers broke. However, you have to dissolve the sugar into the egg whites anyway, and better safe than sorry.
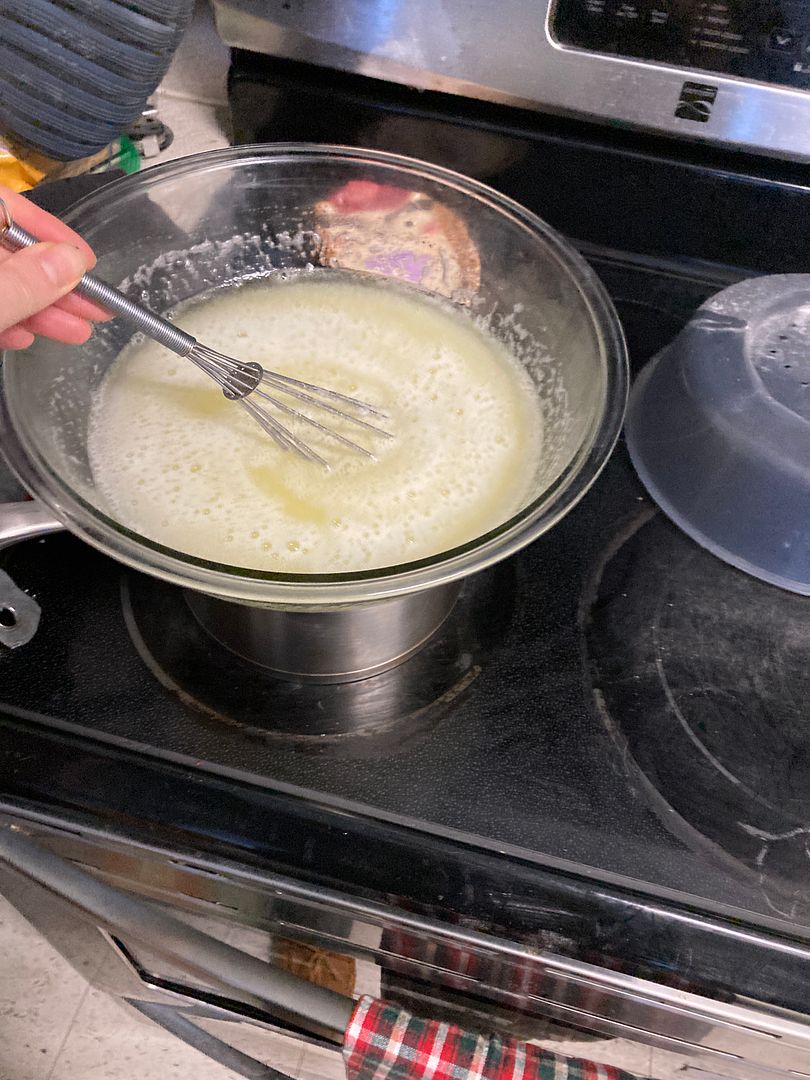
This step is pretty tedious, standing here and stirring for 20 minutes. Don’t give into the temptation to rush it, or you will get scrambled egg whites. Of course you can strain out a little bit of scrambleage, but save yourself the trouble. I just stand there and stir with one hand, and check email with the other. I have been known to give a few bucks to a kid to do this step.
When 20 minutes is up, I take a little squidge between my fingers, lift it up and rub together. I don’t want to feel any grains of sugar, and I want to feel the egg whites are hot enough to almost-hurt. If you’ve ever proofed yeast, you know what temp I’m talking about.
On making the meringue: Then you pour your egg white/sugar/salt into whatever bowl you will use for mixing – a new bowl if you’re using a hand mixer, or the bowl of your stand mixer. Why not just mix it in the same bowl? Well, part of mixing it is bringing the mixture down to room temperature. Since your bowl is still hot from being on the double boiler, this will make your meringue take longer.
Start your mixer at medium speed, then slowly turn it up to the highest setting. It will have to go at it for 5-10 minutes. Keep an eye on it; you’re looking for about soft peaks, but if it goes to stiff peaks that’s OK. You just want it stiff enough that it doesn’t all go back to flat when the mixer stops.
If you have a stand mixer, then while the meringue is whipping, you can cut up and soften your butter.
On softening butter: This is a repeat from yesterday’s cake recipe. You want your butter so soft that you can easily push your finger into it, but not melted. Doing this changes with the seasons. We always keep our thermostat at the same temperature, but somehow my house knows if it is summer or winter.
If it is the summer, just leaving the butter out for a few hours or overnight will make it completely soft. In the winter, even leaving the butter out overnight, it will still be hard the next day. I use an old trick my mom taught me. Since our butter does not come in sticks, I cut it into sticks and put them on a plate, not touching. I then microwave them at 30% power for one minute.
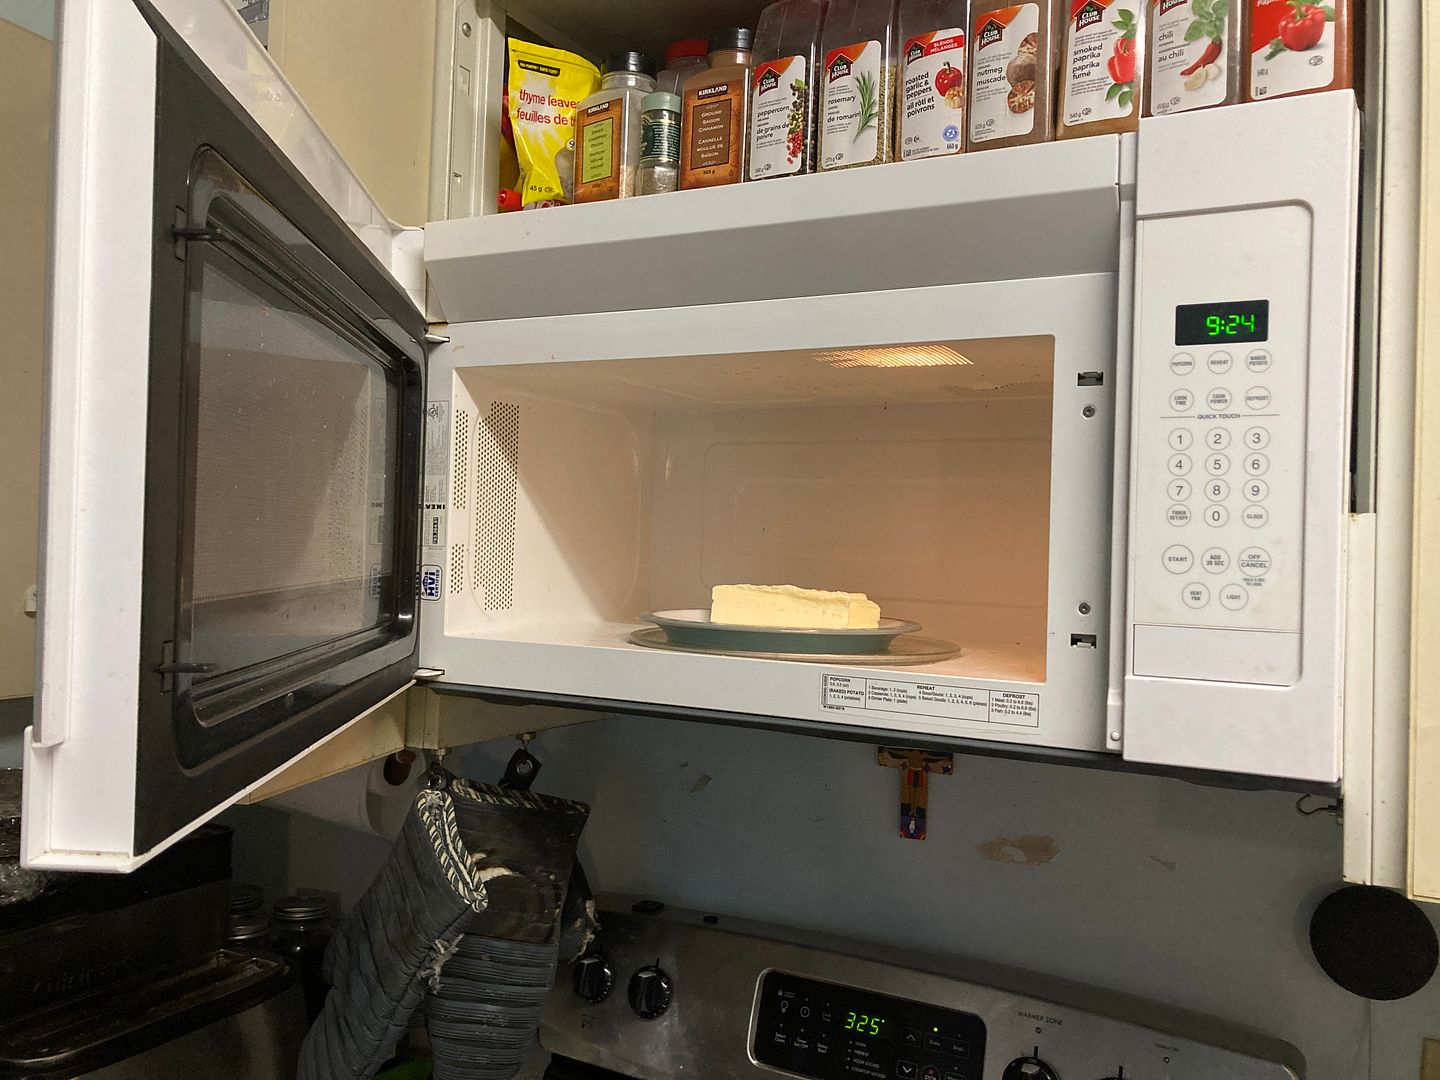
In winter, this will make butter soft that has been sitting out all night. In summer, this will make butter soft if you forgot to take it out out of the fridge. In winter, if you forgot to put your butter out to soften, you will probably have to do this twice to get it soft. Don’t do more than one minute at a time, so you don’t melt your butter.
On adding the butter: When your meringue is whipped to soft peaks, turn the mixer down to low. Add the butter one stick (1/4 lb) at a time. If your butter is nice and soft, adding this much at a time should be no problem. I just slide my sticks in while the mixer is running on low, though I probably shouldn’t tell you to do that. Be aware that when you’re adding that last pound, your mixing bowl will be getting quite full (I have the 6 qt Kitchen Aid). So if you’re worried about spills, just stop the thing and shove your butter way down in there before turning it back on low.
When you have all your butter incorporated, turn the mixer up to medium, then slowly up to high. When it starts to look like amazing buttercream, turn it off and scrape the bowl down thoroughly. Then turn it back up to high and let it go for a few minutes.
You’re now ready to add colour, pipe it, stack cakes with it, whatever you please!
On making buttercream ahead: You can definitely make your buttercream ahead of time and put it in the fridge or freezer. Just keep in mind that you will have to let it thaw and rise to room temperature, then re-whip it – and by extension, clean your mixer again.
I also find that unless you really get it all the way to room temperature on its own, without any help from the microwave, and without cheating and sticking it in the mixer while it’s still a little cold, this re-whipped buttercream doesn’t get all the air back into it. It ends up more dense, more yellow, and it doesn’t stretch as far. It’s all too much work for me, so I much prefer to work with it fresh out of the mixer.
However you may WANT to do this sometimes. If you want a very dark colour for your frosting, especially a bright red, you will get the best colour if you make the buttercream the night before, colour it, chill it, and thaw and re-whip it the next day. By extension, I’ve noticed that colours are darker when mixed into re-whipped buttercream, but your mileage may vary on that one.
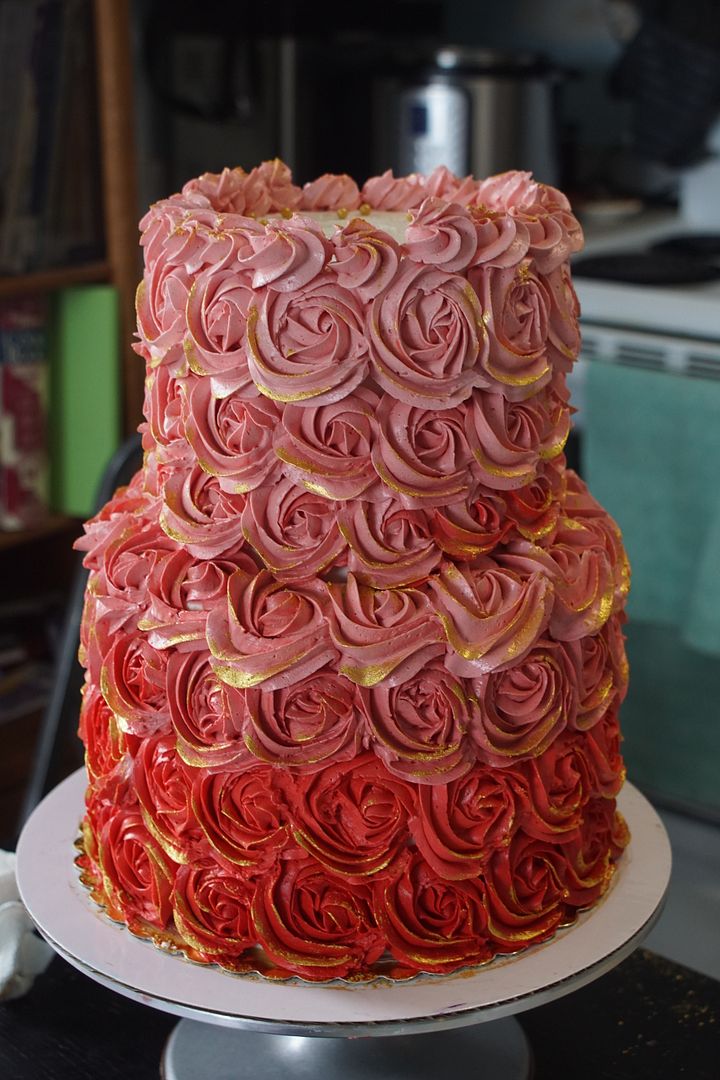
In the cake above, the third row of roses from the bottom are the darkest I could get swiss meringue buttercream with red gel colour. The two rows on the bottom of roses are made with the same exact frosting, saved overnight and re-whipped.
On buttercream gone horribly wrong: Buttercream used to stress me out bigtime, but I’ve found that it’s more forgiving than I thought. There are real bakers who have done real posts on fixing swiss meringue buttercream (google “troubleshoot buttercream”), but these are the main issues I run into.
- If it looks really gnarly while you’re initially mixing it, hang in there. It will probably resolve when all the temperatures equalize.
- If it still looks really gnarly after mixing on high for five minutes, it might be too cold. This mostly happens when I am re-whipping buttercream that was cold, and I didn’t wait long enough, or if my butter isn’t soft. Scoop out 1/4c or so and microwave it for 10 seconds. It will be liquidy. Pour this into the buttercream and whip some more.
- If it looks really runny, or isn’t piping nicely, it might be too warm. This mostly happens when I add chocolate when it’s too warm. You can stick it in the fridge for ten minutes at a time and re-whip.
On cream cheese buttercream: I got this to work for me in the summer. Since it got cold, I have not managed to make smooth, pipe-able cream cheese buttercream, despite all my best softening/warming tricks.
Have you had any luck with cream cheese buttercream? What are your favorite icing recipes?

I have one (chocolate) cake recipe that I have made for coming up on 10 years (although I discovered a second that we like three years ago – a vanilla one), with buttercream frosting that has worked well every time. If I remember, I’ll link it when I’m home. Since we’ve pretty much always been GF, DF (except butter!), and Paleo-ish, cakes and baking in general is hard (plus I don’t eat/allow much sweets, and I don’t especially like baking), but I do like making these…approximately 2x a year and no more! (because our birthdays are bunched, I usually halve the cakes and make smaller double layer cakes. The cakes are so rich we usually don’t want for more than that anyway! Josh gets Elana’s Pantry brownies for his birthday. 😅)
LikeLike
Nice! Yes, “rare and appropriate,” as my friend Rachel says. We’re not so good at such limits here!
LikeLike