This week, I finished my first pair of kamiik: Inuit sealskin boots, made for two-and-a-half-year-old M. Today I’d like to share with you a few slices of that journey.
But I want to preface with this: I say I made these. And I did most of the actual stitches. But as I tell you how these little boots came to be, you’ll see just how many hands touched these boots.
If you take that to its logical conclusion, that started long before I even got the materials. Hunters harvested three different seals whose skins contributed to these boots. Then three different women prepared the skins. The skin with hair was home-tanned and stretched on a frame; the black skin from a bearded seal had to also be dehaired; the white skin had also to be dehaired and bleached perfectly in the sun for months.
Of course, this is always the case in our crafts. Knitting doesn’t start at the yarn store. It starts with sheep and farmers and goes through mills and any other number of hands before it arrives in our hands. In some ways the industry is becoming more transparent as knitters and spinners become more interested in those processes. But here, it’s so much more immediate. With some of these materials, you can’t just go to a store and buy them. You have to at least make contact with someone who worked on that skin when it was still fresh off a living animal. Suddenly, sustainable harvesting and fair wages become very important; you’re talking to someone who gave their time or risked their lives to prepare this materials. Thankfully, in Nunavut we can be confident that good practices are the norm.
During the first stages of preparing the skins, I had my hand held very closely. An elder, Seepa, at the Monday night women’s group, contributed her time to make the patterns I would need, to lend me a large tool for softening the skins, and to show me how to cut the pieces with an ulu.
Seepa even gave me the white pieces I would need for the boots from her own collection of skins, cut them out for me, and sewed the first seam, down the legs. When she returned them to me, she’d made me a little kit with sinew, two kinds of needles, a wee handmade needle keeper, and other little useful goodies.
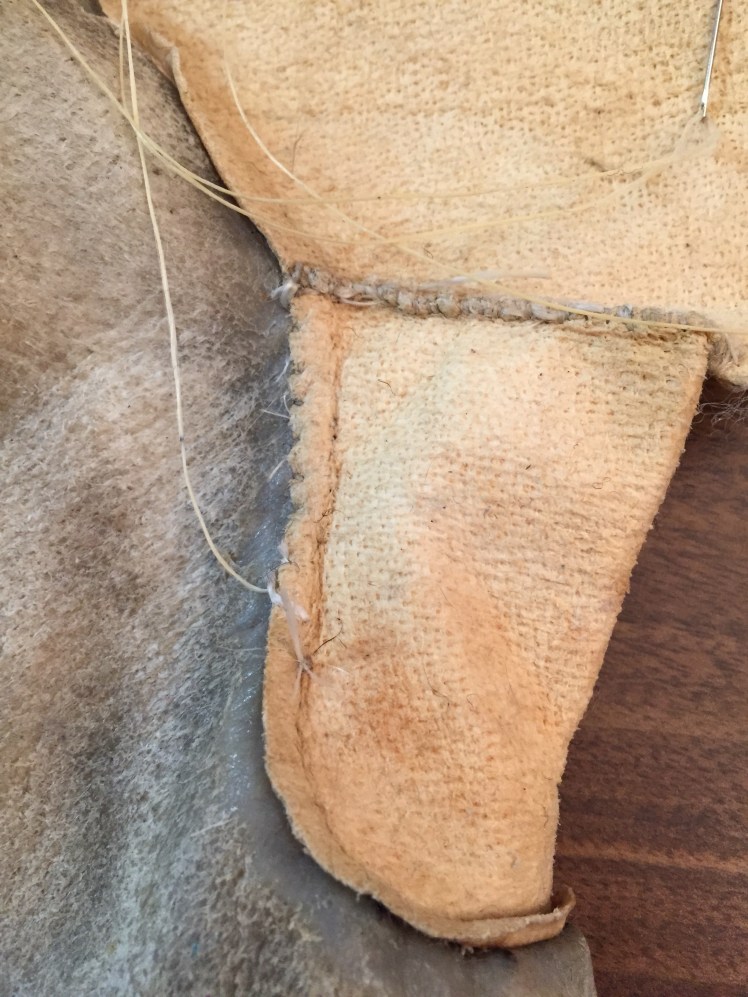
As for me, the first seam I did, I messed up. I was running off my assumption that you can pretty much whipstitch everything, so I just sewed the front piece to the legs. You can just see it on the left below, and the stitches are quite visible, so it wasn’t even good whipstitch! Mercifully, one chorus of this project was, “Well, it’s ok. It’s for a little kid.” Turns out I was supposed to use a special waterproof stitch I hadn’t even learned yet.
I got as far as softening the soles before the Christmas crazies hit. This was a laborious process involving a lot of chewing, and a tool made from pieces of metal stair and two-by-fours. I didn’t take any pictures of this; who knows why. You know I’m always very careful about publicizing traditional Inuit techniques, and I have also learned to be careful about sharing things without explanation that might be perceived by outsiders as strange or unpleasant. I have so much respect for the people who invented and preserve these skills, and I want to engender that in my sharing about it. So I’ll save talking about that process for another time.
Then Christmas happened, I had to give the pieces back to Seepa for fine cutting, and totally failed to reconnect with her over the holidays. By the time she gave me the pieces back, softened in salt water and ready to be sewn on, I got the distinct impression she was a little bit frustrated with me. Quite frankly, I’m glad she expressed that, because I realized I was not taking this project seriously enough. At this point, I had invested a lot of time into the process already, and so had Seepa. To say nothing of the money I’d spent on the materials, which was very significant. If I wanted to finish this ever, I had to get serious, and I had to get more help.
It was then that I took advantage of an offer I’d received, which was to come to the drop-in sewing class at Tukisigiarvik Centre. At one level, this place is a drop-in center for many of the poor and homeless in Iqaluit. But they’re so much more than that, as they share traditional foods whenever available, and teach a host of cultural skills to anyone who wants to learn. M and I got to taste polar bear meat there for the first time one afternoon!
I had wanted to go for a long time, but just couldn’t figure out how afternoons were going to work for me. But suddenly, in January, the timing was right for me to cut my office hours down and then out. M wasn’t taking naps anymore, and they didn’t mind if I brought her along. (One of my favorite things about Inuit culture is how normal the presence is of babies and small children.) Suddenly I was there for a couple hours every day that N was in school. That was where I met my second teacher, Maggie, who walked me through the rest of this process and was so encouraging. There were other ladies in and out through the few weeks I was there, working on their own projects, and they all pitched in with their trips and tips as I needed help. Sarah, Elisapee, Eva – they could all spare a moment to show me something.
After a few days of attaching smaller pieces, I was ready to learn that special waterproof stitch. I had been so intimidated by this stage, but when the time came around, Maggie said, “this is the fun part!” Then when I was going at it, Eva walked in and said, “ooh, that’s the fun part!” They were right.
This was around the time that I remembered to start taking pictures.
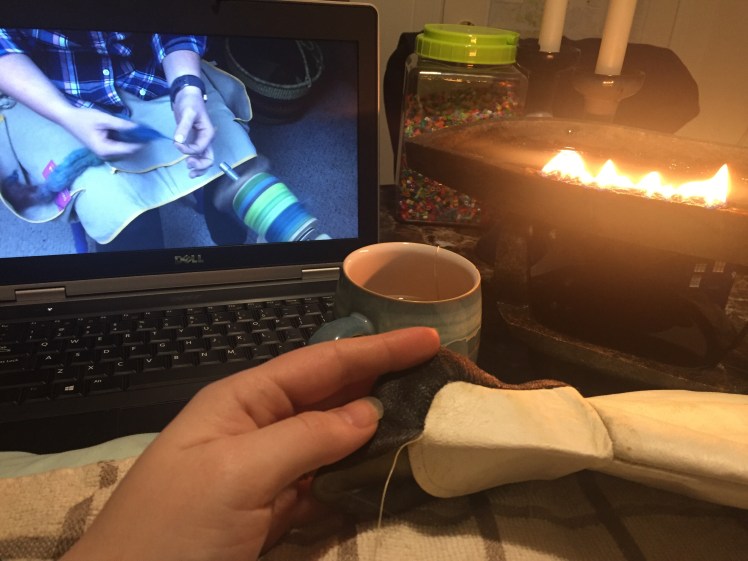
I was so excited that first Saturday night to have a quiet evening of sewing. I had attached the first sole at Tukisigiarvik, and I was determined to do the other myself. Jared was out, I put the kids to bed, set myself up with a comfortable pillow on the dining room table and Rachel’s podcast to watch, lit the qulliq, and had a lovely time. I was so pleased with the above picture: such a typical combination of the super-modern and super-ancient! Until I looked at the second sole, and something wasn’t quite right.

The kamik on the left I sewed the sole on with help; the kamik on the right by myself. Does the toe look a little funny? That’s because I managed to sew the entire sole on, very carefully, backwards. Yup. Back to front.
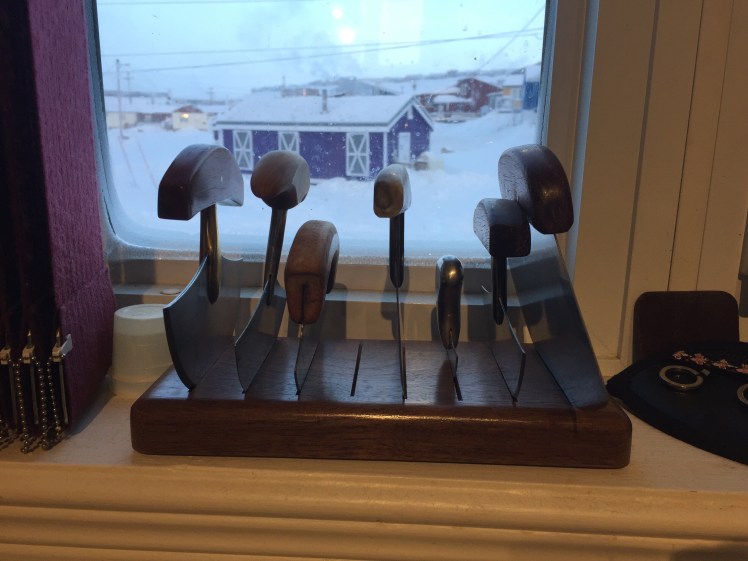
It was Saturday night, and if I have internalized one thing from hanging around a lot of older Inuit Christians, it’s that you don’t sew on Sunday. Okay, no one would really die on that hill anymore, but that’s certainly how everyone grew up! So even though I’m not sewing to survive, I take Sundays off too. Besides, I knew it’d be a lot easier to redo this seam if I did it right away. So I pulled out my handy Inuit seam ripper, a finely crafted tiny ulu that was a special gift from a dear elder friend Uliipika, who did not live to see me finish this process. I took out my previous work, and redid it. A little faster the second time, thankfully. By 11:30 when I tied off, the qulliq was burning pretty low.

The next week back at Tukisigiarvik, it was time to turn these puppies inside out. Maggie and Sarah gave the soles their final shape, and then showed me the inside part of that special waterproof stitch.

Seeing the inside of these skins gives me another chance to talk about these amazing materials. It makes sense, when you think about it, that if you’re going to survive in a harsh environment, the materials to do so will come from animals who have their skin as protection. The black sole comes from a bearded seal, and when we purchased it, it was about as hard as a thin piece of wood, and would bend only reluctantly, like a thick piece of plastic. It took a lot of force just to cut it. The reason all that chewing and sewing had to happen was to soften it enough that it could be sewn by hand. By the time it was finally soaked with salt water and a healthy quantity of spit, it was as supple as a shirt. Sewing with it was incredible. I couldn’t believe it, but it was actually in the sort of shape that I could make it into tiny gathers, and shape the inside edge of the thick skin into a smooth slanting ridge, and sew right through the middle of it to guide the shaping. In order to keep it that soft, I had to keep it in the freezer when I wasn’t working on it, and take it out exactly enough time in advance that it’d be thawed enough to work on again. As it went through subsequent stages, it had to get a little dryer every time. When they are finished and fully dried, they will be back to that incredibly sturdy state, which is only necessary for being a long-lasting outdoor boot. I cannot imagine how any of these techniques were discovered or invented, literally before recorded history, while surviving on the land. You may not want to try this yourself, but you have to respect it.
There were some more final steps, to flatten the gathers around the toe and make the heel stand up straight. There’s a large tool used for stretching the still-damp soles into their final shape, and I’ll have to go on using it to continue stretching and shaping them when they get damp. This is a living material, and it will go on being so while it’s being used.

The moment of completion, at Tukisigiarvik one Thursday afternoon.
But I wasn’t done. This isn’t the only layer of traditional kamiik, and I hadn’t made any of the inner layers yet.
Thankfully, wool duffel is much simpler to work with. Seepa had already given me most of the pattern, and my neighbor Meena taught me how to measure to make a pattern for the leg. I sewed them with the wrong thread to start; I found out from Facebook friends Jane and Annie that you should use at least waxed thread instead of regular sewing thread. But this whole project has been a story of me just trying something, and then being corrected, because I know that if I just wait for every step until I can ask a question, I’ll never get around to it. I’ve learned that if I try something on my own, then show up and say “what did I do wrong?” then I’ll actually make progress, and I’ll really learn that skill when I do it right.
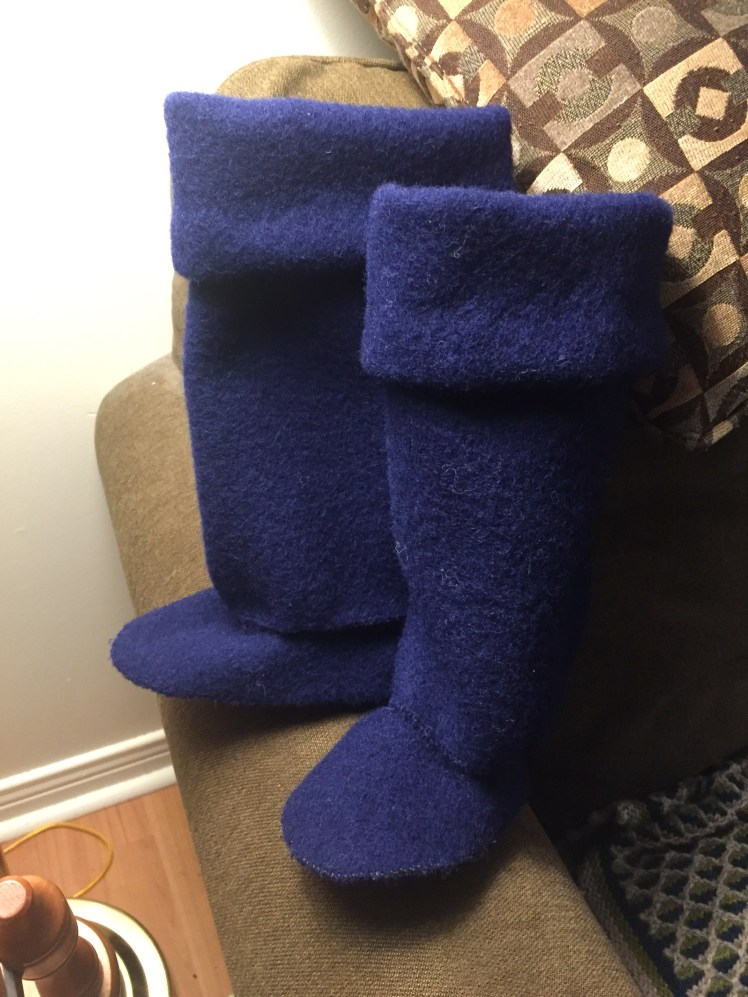
The duffel socks above had to be almost entirely re-sewn – not just because I used the wrong thread, but because they were too big to fit inside the kamiik. And I changed my mind about turning the tops down. It turns out that, in the four months since I asked for the patterns, M’s feet have grown enough that they only just fit in them. Normally there would be two additional layers, two pairs of slippers just on the feet, but I’ll only be able to fit this one layer in now. At this point, I’m glad to save a few steps, have more to learn next time, and after all, she’s just two. Strategically, I’m having another baby girl, so at least I know these will get used again if she doesn’t fit them in the fall! Yep, that’s definitely why we’re having another kid…

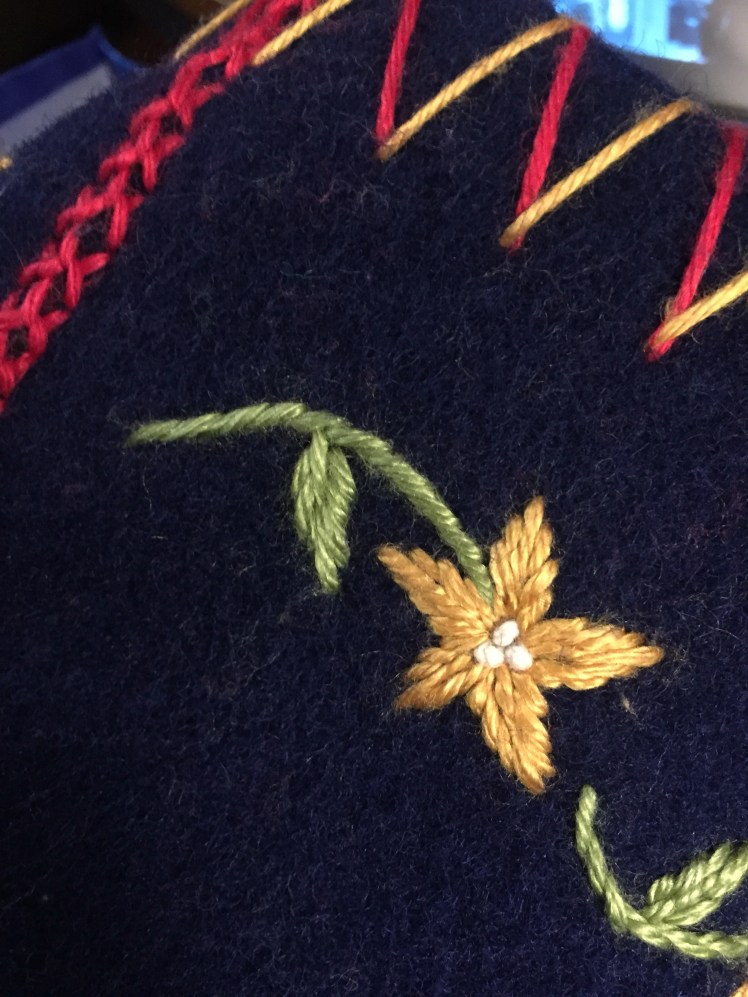
You can pay someone else to do the embroidery on your duffel socks, but I have spent months now staring at the tops of everyone’s boots, and I very much wanted to give it a go. Jane is generously letting me use her remarkable collection of Patons Silk Bamboo. Another Monday night friend, Annie, walked me through the different kinds of decorative stitch I could use over the seams (the red part above), and gave me some ideas for petals I could achieve. That night turned into one of the most lovely Monday nights yet, with us all huddled around watching Meena demonstrate how to embroider roses, trading stories. The next day, the practice piece above saw me refine the petals to a pattern I could repeat. And I finally figured out the french knot, after watching Maggie do like twenty of them. I’ve seriously always wanted to know how to do a french knot!

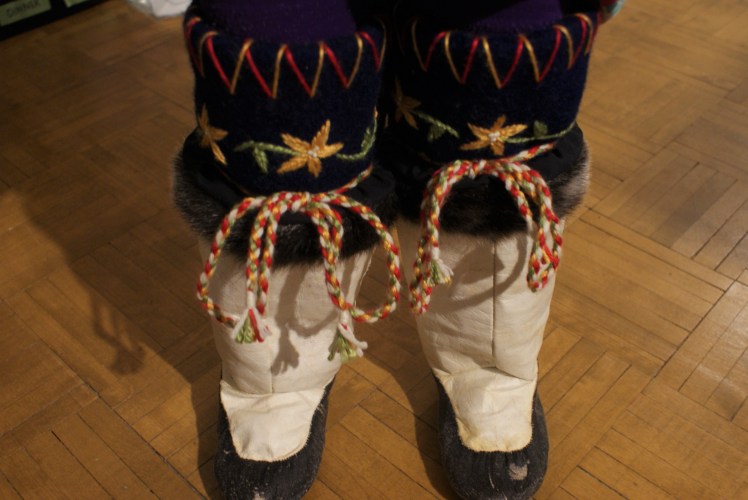
One more Monday saw Ruth and others teaching me how to make the round cord used for tying the kamiik on. Youtube tutorials were not cutting it for me, but a few quick tricks and a demonstration from Ruth had me set. I then made the cord so humorously long that, as Seepa’s daughter Elisapee pointed out on Facebook, it was long enough to make both cords. That just about made my day. Inuit from pre-recorded history to present-day Facebook, helping me out.

They were finally officially finished yesterday.

The eye is drawn to the color at the top, with which I am genuinely pleased. But by now you know that the real action is down here.

Material sturdy enough to be an outdoor boot, in 1 mm gathers. You could not make this up.
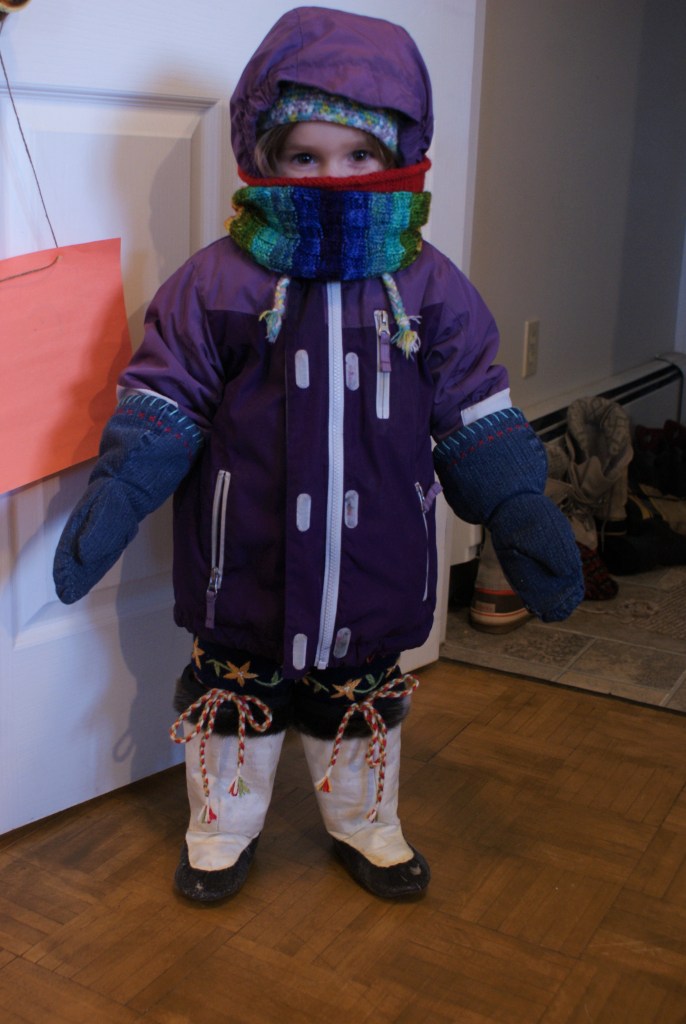
I was pretty careful about how I introduced these to M – I’m no idiot, and I know that getting super emotionally invested in an heirloom handcraft for a two-year-old is not a great idea. With some coaching from my friend Andrea, I said, “Martha, do you want to try on your kamiik, or should we save them for the baby?” She wore them for a whole hour.


When it was time to pick up her sister from school today, she said “I want my kamiik!” Oh, what music to Mama’s ears!
I make things for a lot of reasons, though it gets more meaningful and intentional and less compulsive as time goes by. Still, it’s pretty rare that I make something that feels important. It was important to me to complete these kamiik and pick up the skills I would need to keep going. I’ve purchased the materials I’ll need to make kamit for N, Jared, and myself, and my goal is to make the pairs for N and me before this baby is born.
The Olympics start tomorrow at 6 a.m. EST. Usually I have a major knitting project I try to complete during the two and a half weeks of the Olympics. It’s one of my favorite things to do. But for the first time, my main project for the Olympics is not going to be knitting. I’m going to sew.
Another friend, Mary, mentioned how her mom used to do them all at once, doing the same stages of several pairs at once. I’ll follow Mary’s mom’s example and make N’s duffel socks while I’m on a roll. My goal will be to make all the inner layers of N’s kamiik: duffel socks, slippers, and embroidery. Another friend, Karen, quite a while ago gave me duffel socks and one pair of slippers for myself; I’ll do the second pair of my slippers (made of sealskin) when I do N’s second pair. If I can get through those, and get the pieces cut out for the outer boots of both of our boots, by the end of the Olympics, hopefully I’ll be well positioned to make both of our pairs before the looming ides of April.

N picked her colors yesterday, and I did the first braid today.
When you make something, you take a certain pride in it. But it’s funny: even though so many people helped me, and I made so many mistakes, I’m more proud of these than of most things I’ve made by myself. And thankful even more than proud. I say “I made these,” and it’s true enough. But I made them, and lots of other friends made them, and hunters made them, and precious beautiful animals made them, and a unique, ancient, living culture made them. It’s a gift to be a part of that. That’s why it feels important: I’m not just making something. When I do, I’m trying to honor that gift.

Oh Rebecca they are beautiful in so many ways. Beautiful as a finished article, beautiful for your patience and perseverance, beautiful for the love and learning of yourself and others , beautiful for the insight and sharing and just beautiful for your beautiful daughter! A-maz-ing!
LikeLike
Thanks so much Angela. ❤️
LikeLike
Truly amazing process! How blessed you are to have the opportunity to learn from ladies so willing to pass on their knowledge. You did a beautiful job!
LikeLike
You are so right, I am so blessed by these ladies!
LikeLike
You did a wonderful job on the kamiiks. Enjoyed following your posts on your progress and especially this summary of the whole process.
LikeLike
Beautiful kamiik and a beautiful post! Thanks for sharing with us. I love getting these glimpses of your northern life.
LikeLike
Thanks for reading 🙂 and for sharing your awesome country!
LikeLike
Ha! Wish I were there! Though maybe a few (thousand) km south of you 😉
LikeLike
Yeah a bunch of stuff is closed today because windchill is -50 😂
LikeLike
Meanwhile, schools were closed here a few days ago because it was… raining. I kid you not.
LikeLike
LOL what?! Maryland is like a rainforest! That’s just inventing new ways to be wimpy.
LikeLike