There is a time for every increase – a time to Knit front back and a time to yarn over, a time to Make 1 Right and a time to Make 1 Left. These last two, abbreviated M1R and M1L, respectively, are two of my favorites. They are a perfectly matched pair, mirror images of each other, and seem to grow stitches out of nowhere. I used them in the Lenten KAL’s Clue #2, and they are integral to my Knotty sock pattern. They are also massively useful anywhere you need a series of paired increases, like on a top-down raglan-shaped sweater.
If videos are your preference, for these techniques I recommend KnittingHelp.com’s increase page.
Pay attention in the M1R section below, and you’ll learn how to do an M1P as well – just like any other M1, but it grows a purl stitch out of nowhere instead.
M1R – Make 1 Right (and M1P – Make 1 Purl)
One of my favorite lines from a video game comes from a wrongly-accused biker to a traitorous bartender with a nosering: “You know what might look better on your nose? THE BAR.” (mild, pixelated violence ensues, in which the bartender gets pinned to his bar by his nosering. If you actually get that reference, you should come over to my house next time I have a party to excavate old LucasArts adventure games. Yes, I have those.)
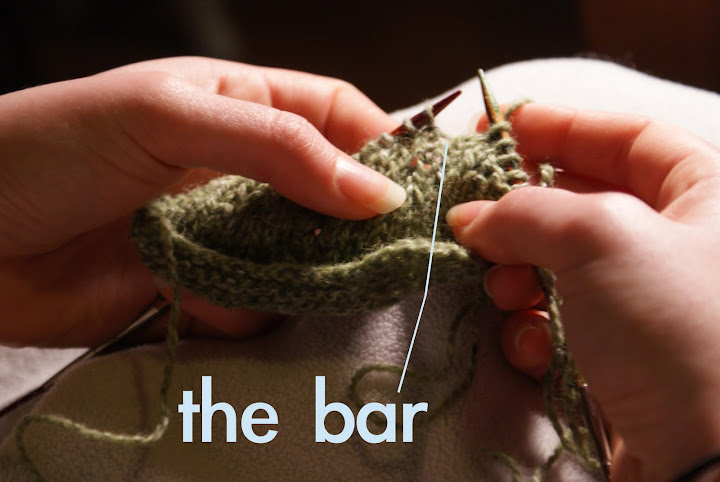
All that to say – both the M1R and the M1L appear out of nowhere because they are knit into that little line that appears between two stitches when they are separated between your needles. We lovingly call this tiny stretch of yarn The Bar, and M1R and M1L are performed by picking up the bar and knitting into it, twisting it one way or the other.
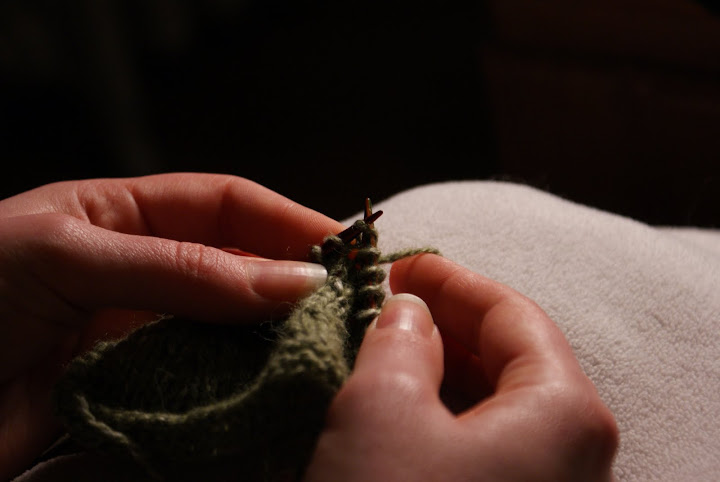
To do the M1R, you will begin by scooping up the bar from behind.
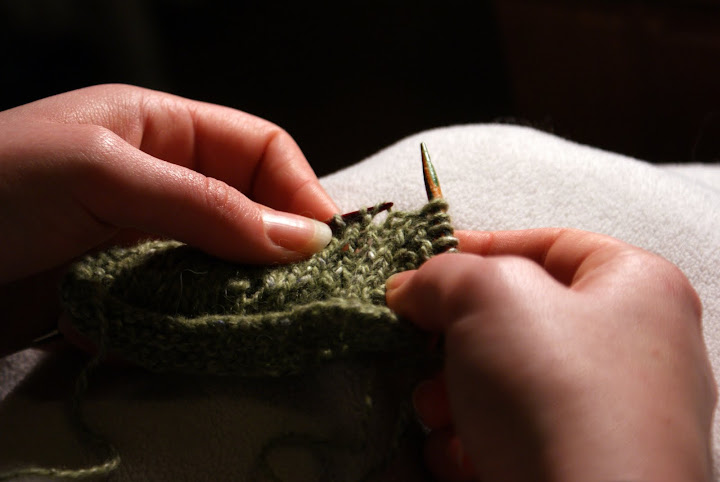
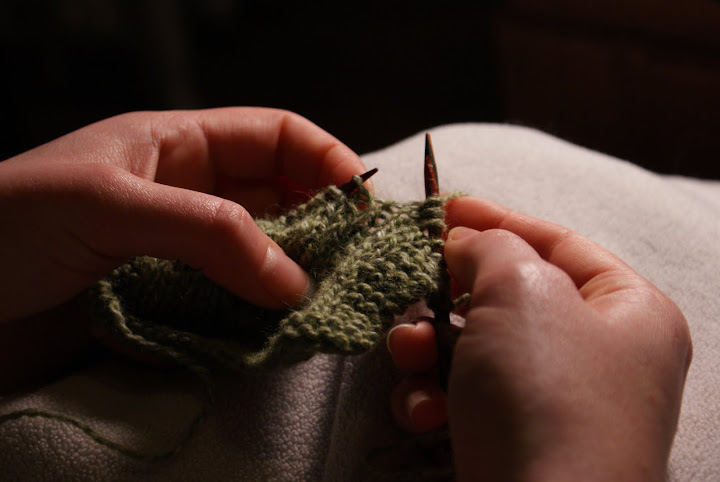
This orients the bar on your left needle as shown, with the front leg of the stitch slanting down towards your left and and the back leg slanting down towards your right. In order to twist the stitch to the right, you are going to knit into that front leg.
(To do an M1P – Make 1 Purl – purl into that same leg.)

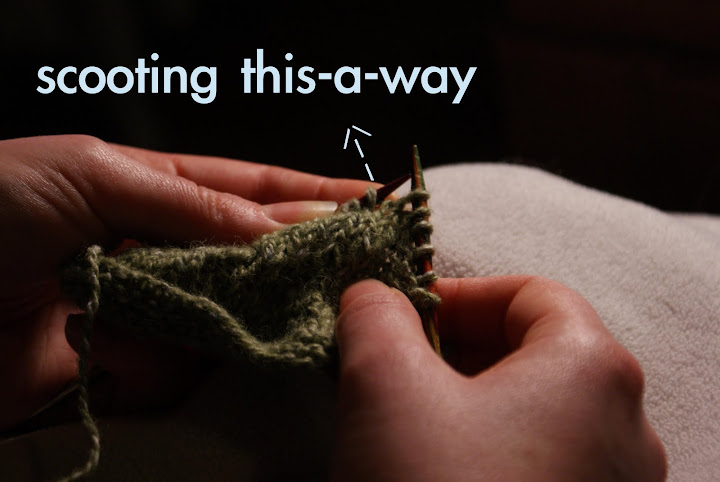
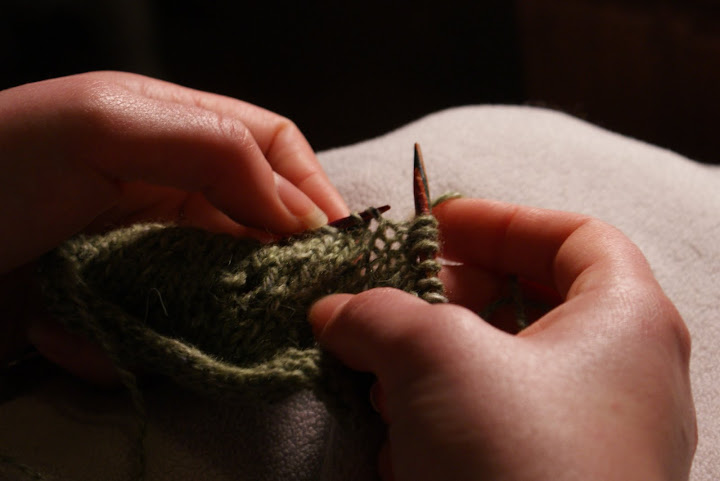
This is sort of difficult. To make it a little easier, I use my left index finger to scoot the back of this bar stitch up, giving slack in the front. I try to capture this process below.
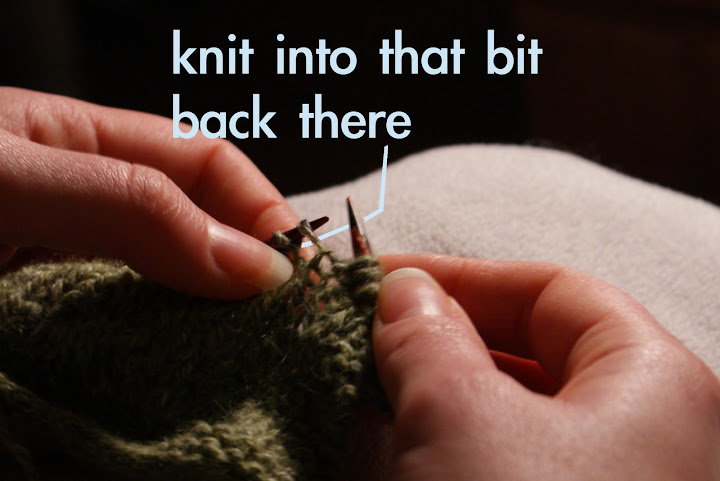
A successful insertion of the working needle into this front leg should look like this:
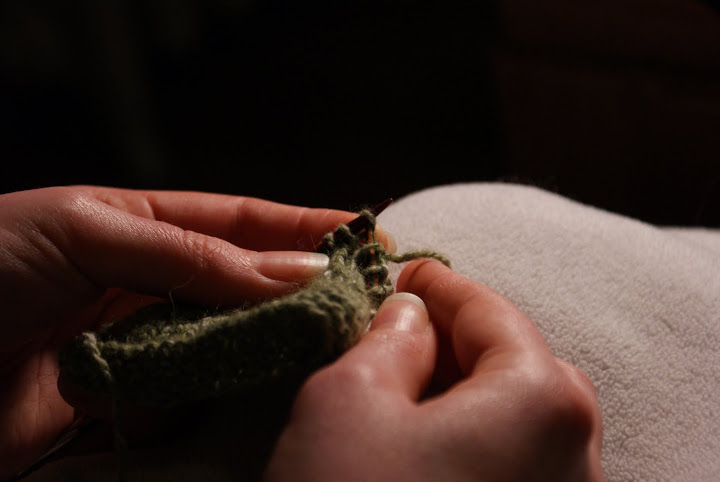
After you complete this knit stitch normally, by wrapping your working yarn around the working (right) needle and pulling that wrap through, the resulting new stitch appears to slant to the right, because the right-leaning leg crosses atop the other.

To make an M1P, pick up the bar as shown above, then insert the working needle purlwise into the front leg of this new stitch. Complete the purl as usual.
M1L – Make 1 Left
When you are ready to perform an M1L, you are once again facing the bar.
But this time, you will scoop up the bar with your left needle from the front.
This orients the new bar stitch on your left needle so that the back leg slants toward your left hand, and the front leg slants toward your right. This time, you are going to knit into the back leg. This is sort of hard to see in the picture below, so I’ve tried to be very clear:
This looks more or less like this.

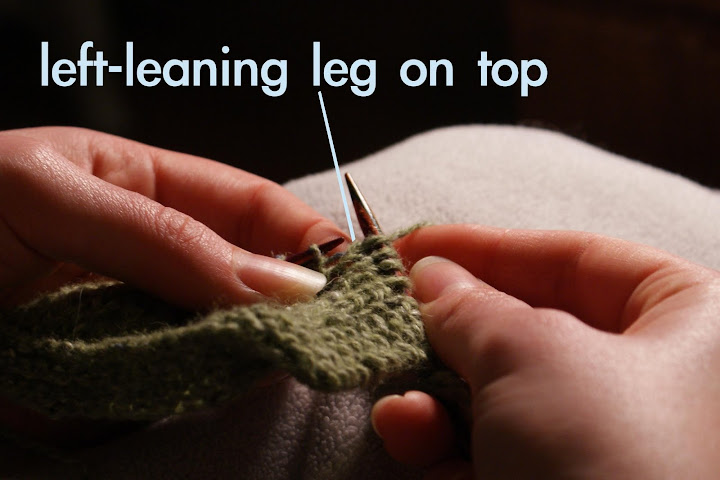
When you complete this knit stitch normally, you now have a knit stitch appearing out of nowhere that appears to slant to the left, because the left-leaning leg crosses over the other.
Results
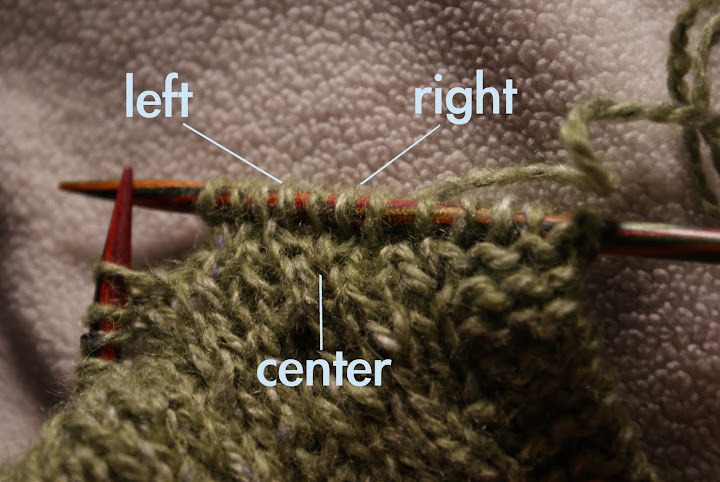
Below, I have performed a M1R and M1L on the right and left of a center stitch. This is often how you will see these increases paired in a top-down raglan, for example. Observe their perfectly mirrored slanty-ness. You can imagine that if you switched them – doing the M1L on the right of the center stitch, and the M1R on the left – the increases would look a little different, but equally pleasing. In such situations, you can pick your poison.
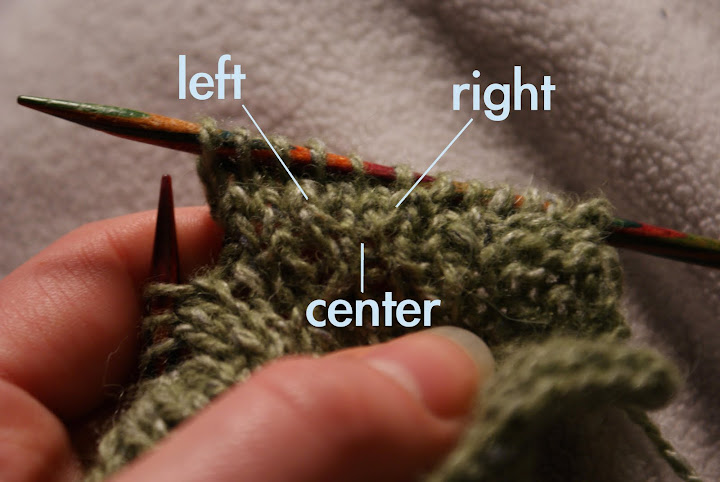
Here are the same three stitches a couple of rows later, so you can see how the new column of knits seems to grow out of the center stitch.

Rebecca,
I definitely know the video game (although I can’t remember the name). I remember being stuck on it in middle school b/c I didn’t understand siphoning gas, which was needed to unlock a particular section. My sis and I also loved Day of the Tentacle and Indiana Jones that came with the computer we got in high school.
Really enjoying the KAL so far. Thanks for putting it together.
LikeLike
Haha! Go you. 😉 It’s Full Throttle. Indiana Jones was the best! I finally played Day of the Tentacle this year. My next conquest is the old Monkey Island games.
LikeLike
Love the photos-very helpful. Also like the reference to Ecclesiastes-my favorite book!
LikeLike
I got through the M1’s, and all the cables, but can’t seem to get the bobble. It doesn’t “bob”, it only “poof’s” a bit and seems unfinished.
LikeLike
Hi Linda,
A couple of options come to mind (I can’t know what happened without actually seeing your work): Did you push the bobble all the way to the front? Sometimes it gets stuck in the back. If so, did you go back and forth on those five stitches before decreasing again?
LikeLike
I see the M1L and M1R but how do you make the M1P? Make one purl?
LikeLike
I see the M1L and M1R. How do you execute the M1P-make one purl?
LikeLike
How funny! I didn’t actually include it. I’ll have to change the title on the post. To do an M1P, pick up the bar from the back as if to do an M1R, then purl into the front leg of this new stitch.
LikeLike
So how do I make both of these increases? The pattern calls for both and they are not between purl stitches. Thanks! Love your diagrams above and finally understand the leaning left and right positions of the stitches. Now I just need to get these two purl increases.
LikeLike